In my last post Real-Time Web Application in ASP.Net Core SignalR, I have covered real-time web application suing SignalR. For the web page, I used a plain HTML page, and just used Browser Console to write response from the SignalR stream. Today I will build an application using React.JS with ASP.Net Core SignalR.
Today I will build a React.js application which will get real-time message from SignalR stream.
What is React.js
React.js is a JavaScript library for creating Web user interface. It is used for creating Single Page Application. It is built by Facebook and open sourced. React.js is declarative and component based. For more information on React.js you can visit https://reactjs.org/.
Installing Visual Studio Code (aka Code)
First of all, for the JavaScript programming, I will use Visual Studio Code. Code is built by Microsoft. It is very similar to Visual Studio, but more focused on browser technologies. And its open sourced.
I will download Code from the download url : https://code.visualstudio.com/docs/?dv=win. Finally I will install the downloaded installer in my PC.
Installing Yoman
Yoman is a scaffolding tool for web applications. Hence, for creating React.js application, I will use a scaffolding generator. And for that, I will first install Yoman.
Since node and nmp and the prerequisite For installing Yoman. Hence, both of these should be first installed. I have already installed these in my PC.
For installing Node and npm, please read my last blog Real-Time Web Application in ASP.Net Core SignalR.
Finally, I will use command npm install -g yoman to install yoman.
Installing React.js Generator
Next thing I will do is install the React.js generator so that I can create all the scaffolding necessary for creating the application. I will use npm install -g generator-react-webpack to install the generator.
Creating React.js Application
I will go to my apps folder using cd apps. Inside of apps I will create a new directory named “timemanagement-web” and go to the folder using “mkdir timemanagement-web && cd timemanagement-web”.
Once I am inside the newly created folder, I use the command yo react-webpack to create the React.js scaffolding for my web project. After the scaffolding is created I will open the code in VS Code using the command code . in the command prompt.
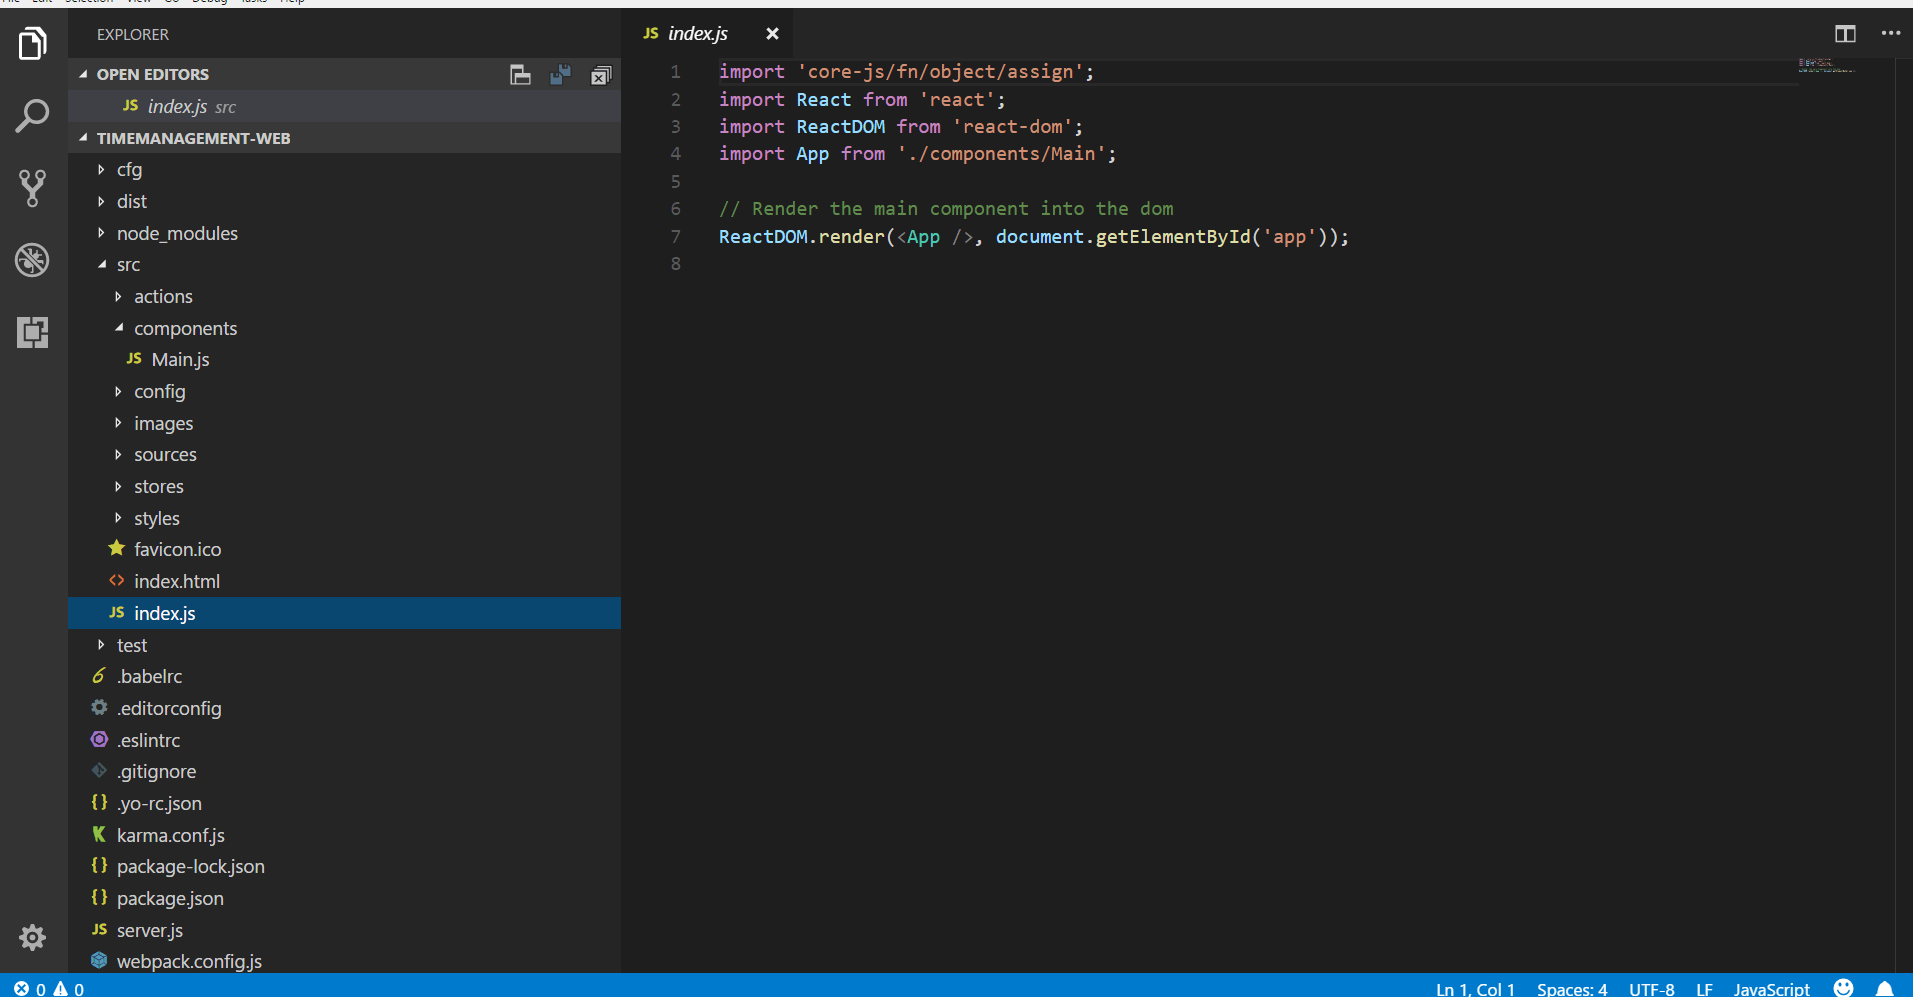
Code Structure
In the folder structure, the index.js file is the bootstrap file. I will update the Main.js file inside the scr -> components folder to add the code for SignalR integration.
Calling SignalR
First I will install SignalR javascript package in my timemanagement-web project. I will use the command “npm install @aspnet/signalr-client” for that. Once the SignalR is installed, I will update the AppComponent class inside of Main.js.
First I will create a constructor for the class and define state inside of it.
Furthermore, I will add componentDidMount lifecycle method which will be called by React.js infrastructure after the component is mounted. And inside this method, I will create HubConnection and add it to the state. Finally I will attach the booking SignalR callback to update the bookingMessage state.
require('normalize.css/normalize.css');
require('styles/App.css');

import React from 'react';
import { HubConnection } from '@aspnet/signalr-client';

let yeomanImage = require('../images/yeoman.png');

class AppComponent extends React.Component {

  constructor(props) {
    super(props);

    this.state = {
      bookingMessage: '',
      bookingHubConnection: null
    };
  }

  componentDidMount = () => {

    const bookingHubConnection = new HubConnection('http://localhost:59084/bookingHub');

    this.setState({bookingHubConnection}, () => {
      this.state.bookingHubConnection.start()
      .then(() => console.log('SignalR Started'))
      .catch(err => console.log('Error connecting SignalR - ' + err));

      this.state.bookingHubConnection.on('booking', (message) => {
        const bookingMessage = message;
        this.setState({bookingMessage});
      });
    });
  }

  render() {
    return (
Hello World! {this.state.bookingMessage}
    );
  }
}

AppComponent.defaultProps = {
};

export default AppComponent;
Update Timemanagement.Service
Next I will update the Timemanagement.Service project to allow cross origin calls. This is necessary for the React.js application to be able to get the data stream from the SignalR hub. For that I will add the following code into existing Startup class. (To understand more about the SignalR, please go through my previous post Real-Time Web Application in ASP.Net Core SignalR)
services.AddCors(option => option.AddPolicy("CorsPolicy", p => p.AllowAnyHeader().AllowAnyOrigin().AllowAnyMethod()));
I will add AllowAnyOrigin and AllowAnyMethod to the CORS policy.
Running React.js Application
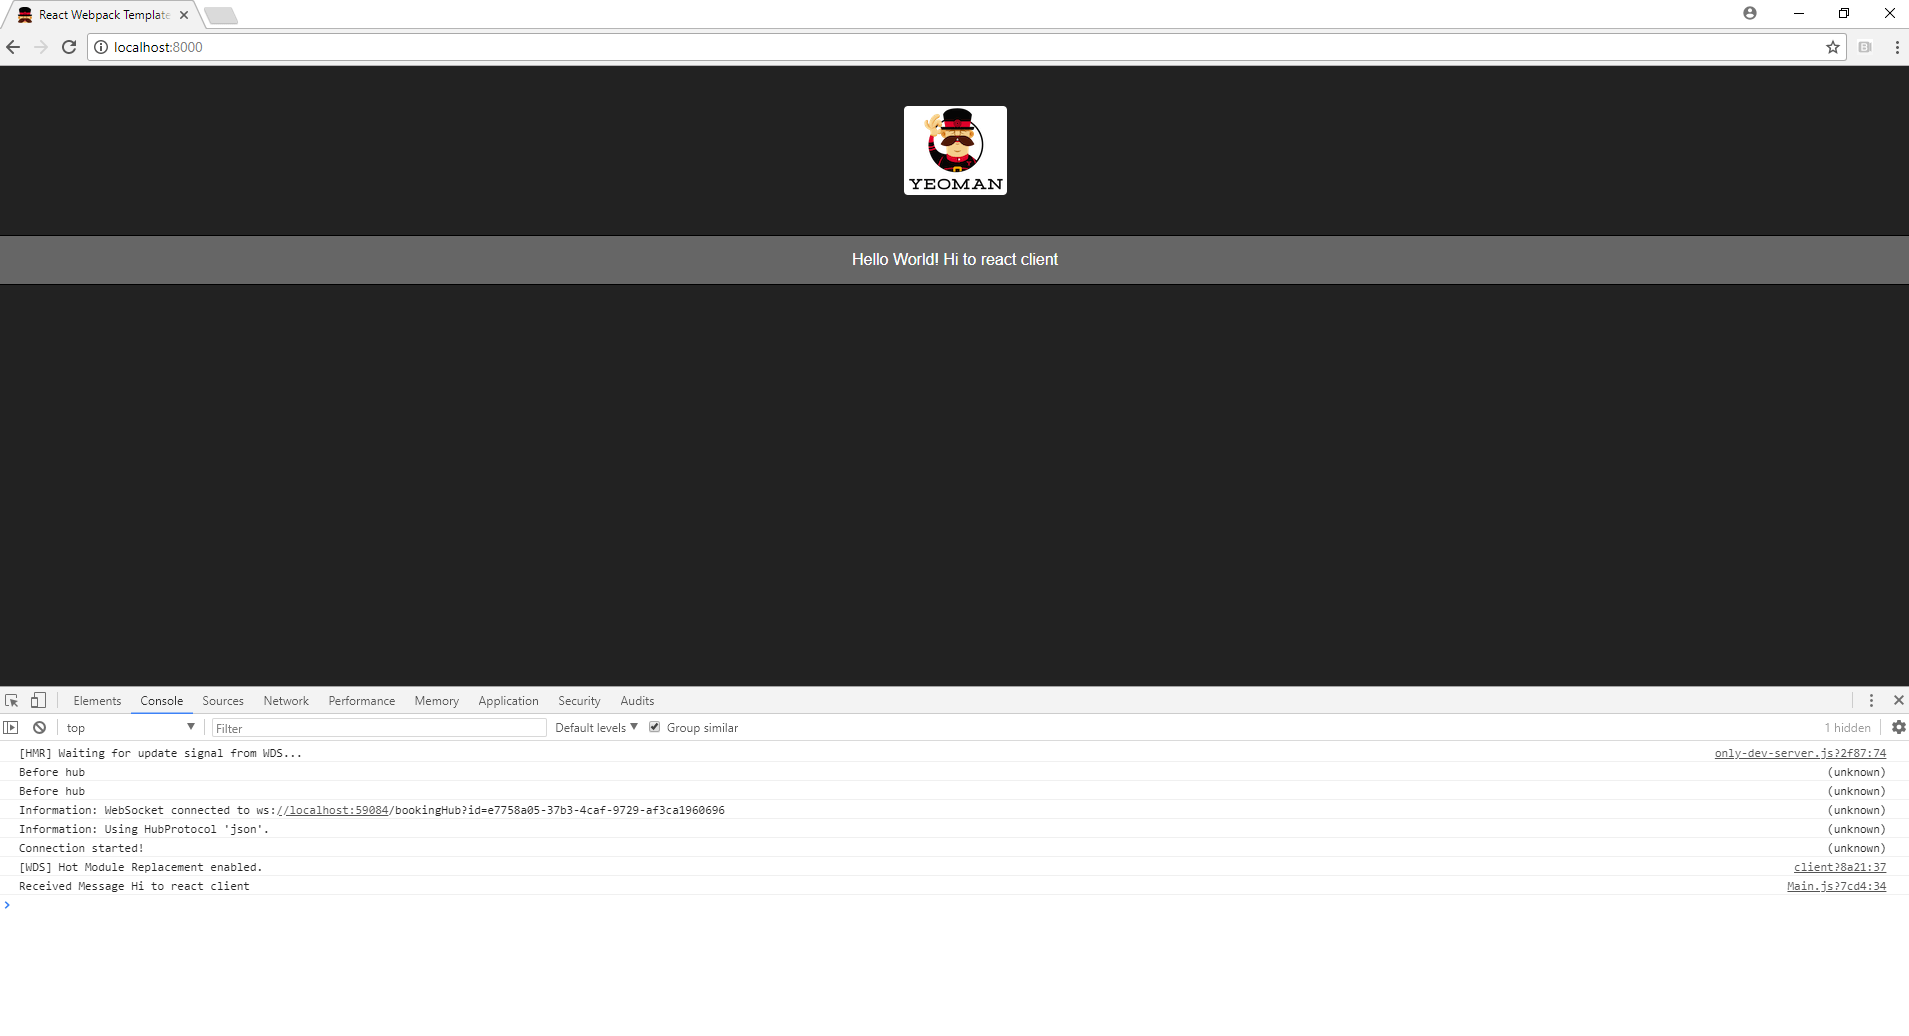
Next, I will run the application using command npm start. This will start the node server to serve the application. Once the application is started I will open the Kafka producer (created in my post ASP.Net Core Streaming Application Using Kafka – Part 2), and send a message : Hi to react client, and the message will appear in the React.js UI.
Conclusion
As you can see, building a basic React.js application is very easy using the Yoman generator. It creates scaffolding with all best practices. And integrating the SignalR with React.js is also very simple and straightforward.
Furthermore, I created a YouTube video. And in this video I recorded the steps I followed for creating the React.js application with ASP.Net Core SignalR integration.
https://youtu.be/BA7O_6PirRA
References
React.js: https://reactjs.org/
Yoman: http://yeoman.io/