Hello everyone, welcome back to .Net Core Central. Today I am going to start the Integration testing of the Time Management application. The application which I have started building from my blog post Creating First ASP.Net Core Web API Application. For the integration test I will use XUnit framework as the testing framework. This is same as I did for the unit testing in my previous post ASP.Net Core Web API – Unit Testing With XUnit. And I will introduce a couple of other Nuget packages along the way. So lets get started.
What is Integration Test
Integration test is the phase of software testing, which is usually done after the unit testing phase. And one of the pre-requisite for the integration test, is that all the necessary components required for the functionality that we will have to test, should be available. Unlike unit testing, integration testing involves access to databases and external I/O (if the application uses one). During integration testing, individual software components are combined and tested as a group. Integration testing is a very critical phase of the software development. Failed to complete integration test can be disastrous.
Creating Integration Test Project
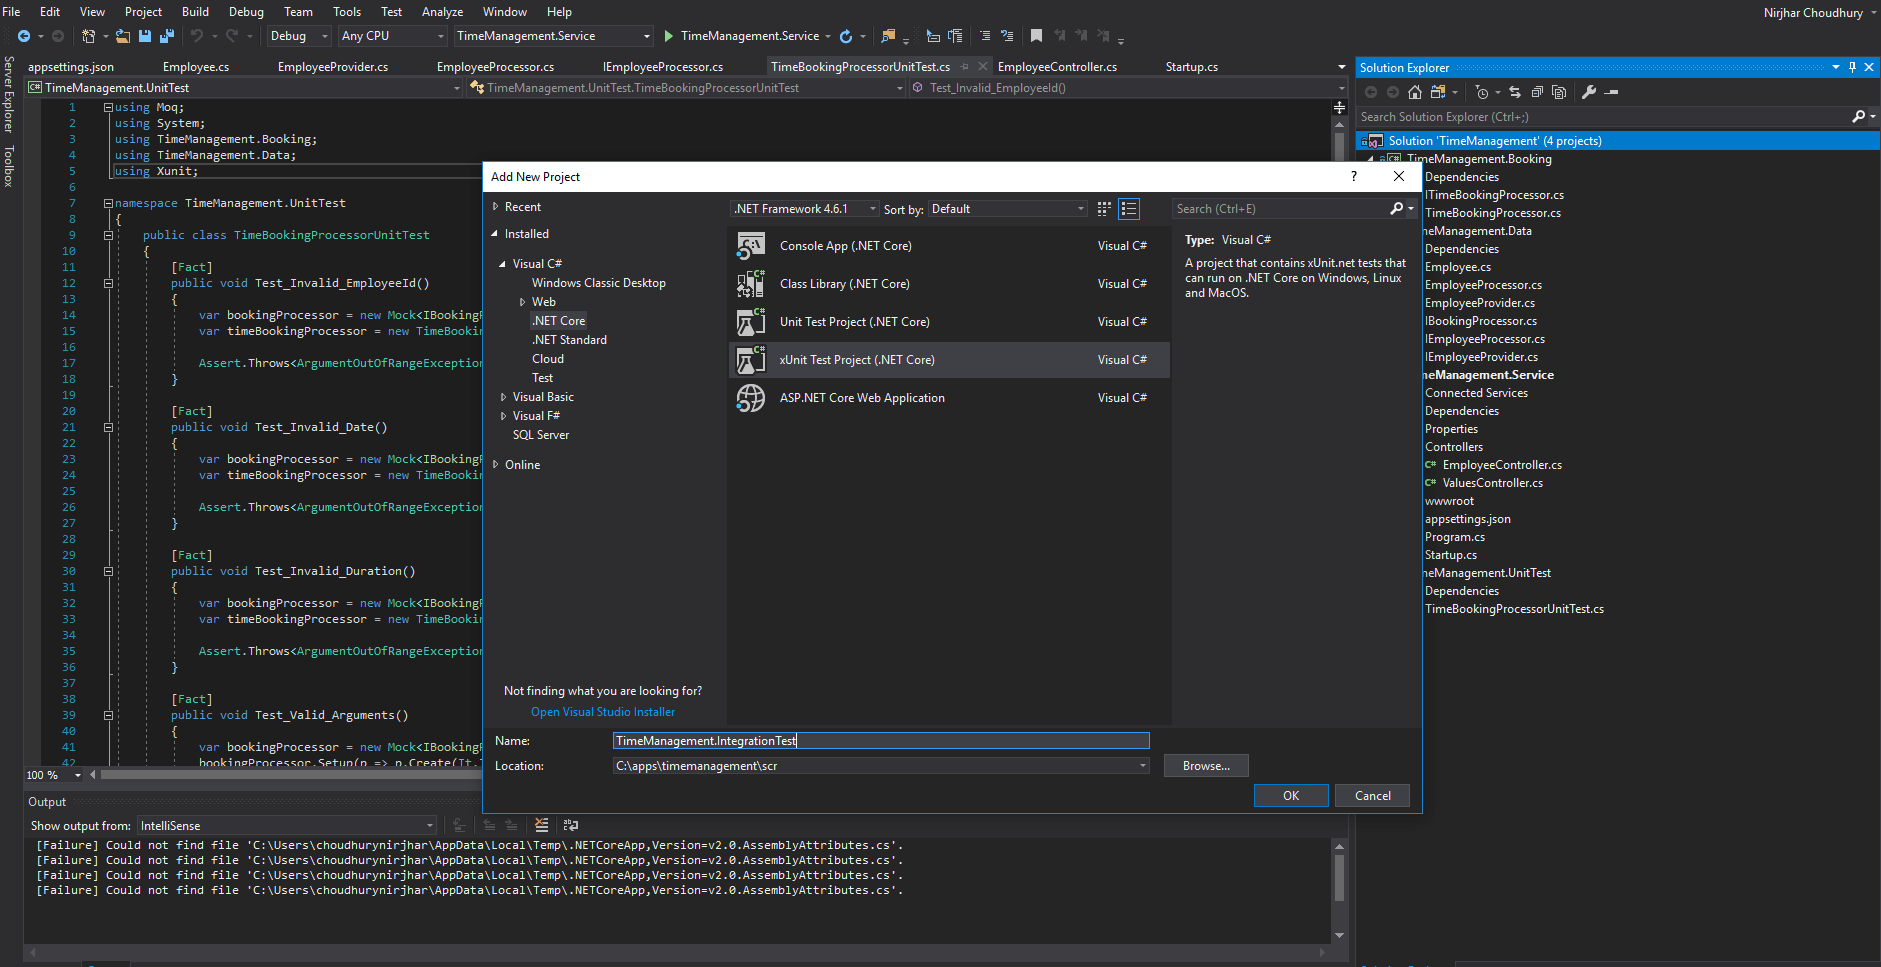
First of all I will open the TimeManagement application solution in Visual Studio 2017. After the solution is opened, I am going to right click on the solution and select “Add” -> “New Project“. This will open up the New Project model window. In the New Project model window, I am going to select “.Net Core” -> “xUnit Test Project (.NET Core)” and give the name of the project “TimeManagement.IntegrationTest” and click “OK“.

After the project is created, I am going to add the project reference to the TimeManagement.Service project. After that, I am going to add a Nuget package “Microsoft.AspNetCore.TestHost”. This package will provide the testing infrastructure for the integration testing. The class from the package that I will use is TestHost. Which I will use for creating a test environment for ASP.Net Core Web API. I will create a new class named TestClientProvide. And in the constructor of TestClientProvide I will create a new instance of TestHost. And I will call the CreateClient method on the TestHost instance to get a HttpClient object. The HttpClient object will be used in the integration test class for connecting to the ASP.Net Core Web API.
public class TestClientProvider
{
    public HttpClient Client { get; private set; }

    public TestClientProvider()
    {
        var server = new TestServer(new WebHostBuilder().UseStartup());

        Client =  server.CreateClient();
    }
}
Integration Test GET
First I will rename the default Class1 created inside of the integration test project to EmployeeApiIntegrationTest, because that is what I am about to do. I am going to do the integration test for the methods inside of the Employee Web API. And the first method that I will create will be Test_Get_All. And this method will be used to test the GET method (which returns all employees).
Employee Web API Code for your reference below. But to follow the application, I would suggest you to start from the blog Creating First ASP.Net Core Web API Application.
[Produces("application/json")]
[Route("api/Employee")]
public class EmployeeController : Controller
{
    private readonly IEmployeeProvider employeeProvider;
    private readonly IEmployeeProcessor employeeProcessor;

    public EmployeeController(IEmployeeProvider employeeProvider, IEmployeeProcessor employeeProcessor)
    {
        this.employeeProvider = employeeProvider;
        this.employeeProcessor = employeeProcessor;
    }

    // GET: api/Employee
    [HttpGet]
    public IEnumerable Get()
    {
        return employeeProvider.Get();
    }

    // GET: api/Employee/5
    [HttpGet("{id}", Name = "Get")]
    public string Get(int id)
    {
        return "value";
    }

    // POST: api/Employee
    [HttpPost]
    public void Post([FromBody]Employee employee)
    {
        employeeProcessor.Create(employee);
    }

    // PUT: api/Employee/5
    [HttpPut("{id}")]
    public void Put(int id, [FromBody]Employee employee)
    {
        employee.Id = id;
        employeeProcessor.Update(employee);
    }

    // DELETE: api/ApiWithActions/5
    [HttpDelete("{id}")]
    public void Delete(int id)
    {
        employeeProcessor.Delete(id);
    }
}
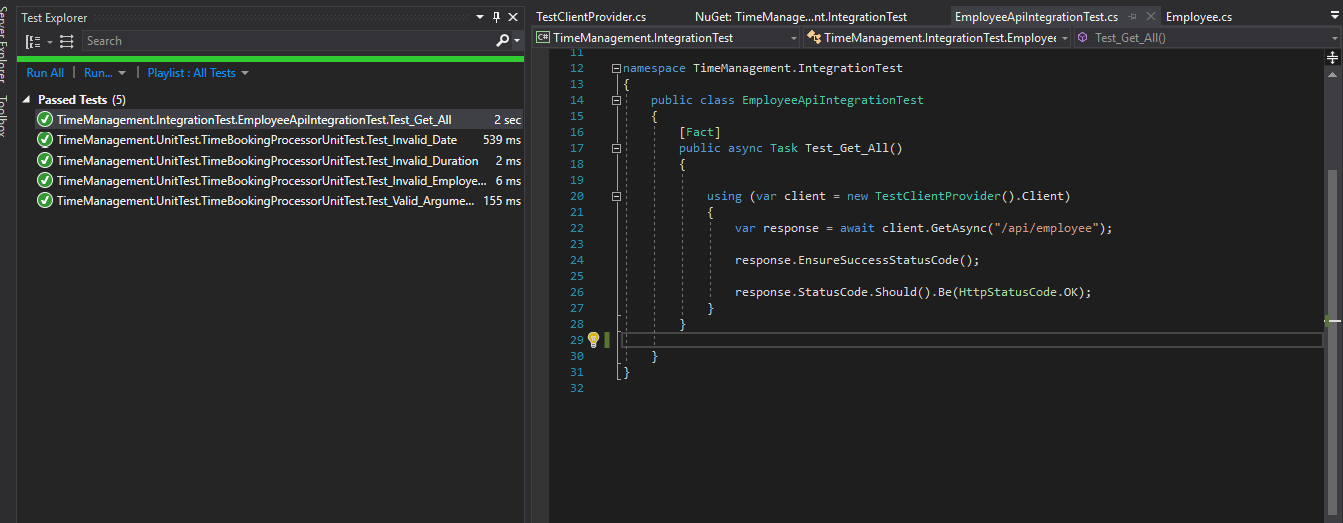
Inside the Test_Get_All method I will create a new instance of HttpClient, using the TestClientProvider class. After that I will call GetAsync method on the HttpClient object, to test the API "/api/employee". Which will return a HttpResponseMessage object. And finally using the Assert.Equal method I will find out if the response status is HttpStatusCode.OK.
[Fact]
public async Task Test_Get_All()
{

    using (var client = new TestClientProvider().Client)
    {
        var response = await client.GetAsync("/api/employee");

        response.EnsureSuccessStatusCode();

        Assert.Equal(HttpStatusCode.OK, response.StatusCode);
    }
}
Now I will run the unit test to make sure the test is a success. And I can see the test is green in the test console.

Refactoring TestClientProvider
The TestServer implements IDisposable, so is HttpClient. So I am going to refactor the TestClientProvide to implement IDisposable. And inside of the Dispose method, I am going to dispose off both TestServer and HttpClient instances.
public class TestClientProvider : IDisposable
{
    private TestServer server;

    public HttpClient Client { get; private set; }

    public TestClientProvider()
    {
        server = new TestServer(new WebHostBuilder().UseStartup());

        Client =  server.CreateClient();
    }

    public void Dispose()
    {
        server?.Dispose();
        Client?.Dispose();
    }
}
To incorporate this in the test method, I will update the test as well.
[Fact]
public async Task Test_Get_All()
{
    using (var client = new TestClientProvider().Client)
    {
        var response = await client.GetAsync("/api/employee");

        response.EnsureSuccessStatusCode();

        Assert.Equal(HttpStatusCode.OK, response.StatusCode);
    }
}
FluentAssertions
FluentAssertions is an assertion framework using fluent syntax. It can be used with XUnit for testing. And we can use fluent API for testing purposes. For using FluentAssertions, I am going to download and install the nuget package in my integration test project. And after it is installed, I am going to add the FluentAssertions namespace into the EmployeeApiIntegrationTest class. And after that I will update my Test_Get_All method to use the fluent syntax.
[Fact]
public async Task Test_Get_All()
{

    using (var client = new TestClientProvider().Client)
    {
        var response = await client.GetAsync("/api/employee");

        response.EnsureSuccessStatusCode();

        response.StatusCode.Should().Be(HttpStatusCode.OK);
    }
}
Integration Test POST
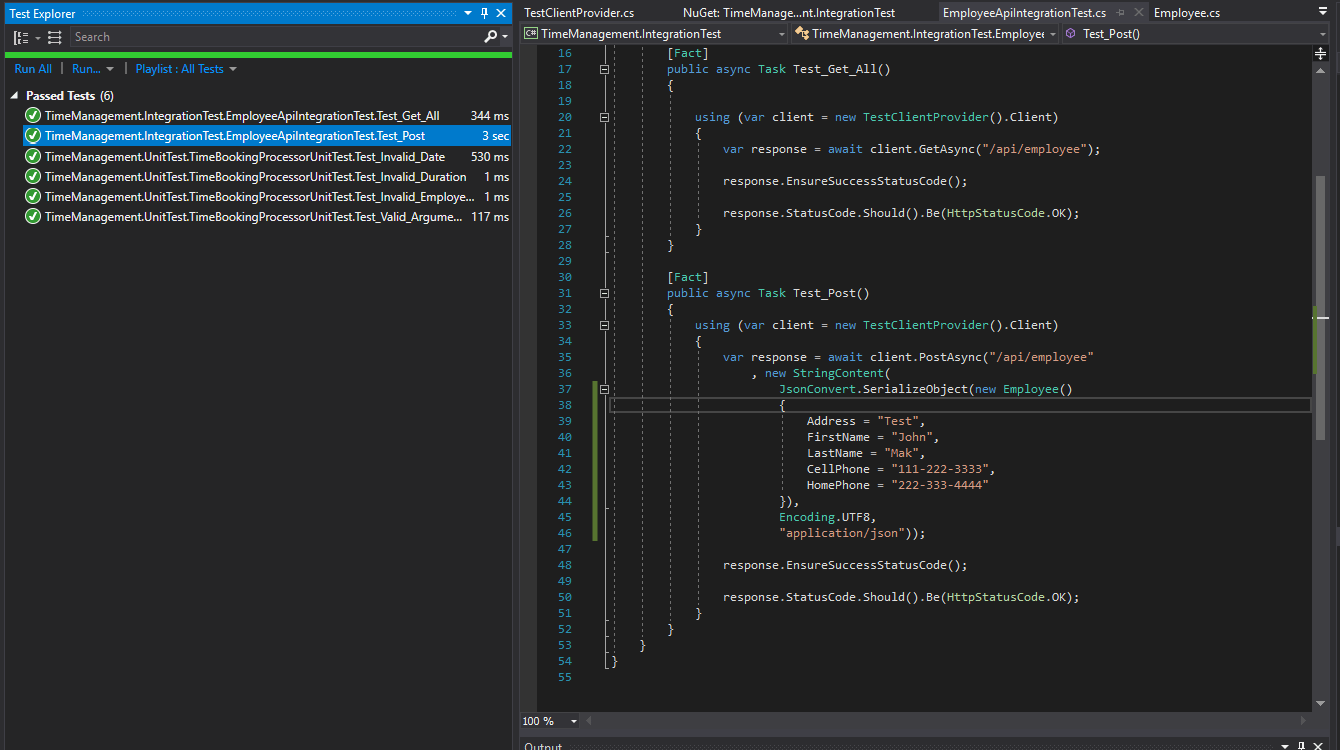
Similar to the GET method, I will test the POST method for the Employee API. For that, I will use the PostAsync method. The PostAsync method also needs a HttpContent object, which will contain the actual content. I will use Json.NET to serialize the Employee object into string format, and will pass an instace of StringContent to the PostAsync method. I will also specify the encoding as UTF8 and media type as "application/json".
[Fact]
public async Task Test_Post()
{
    using (var client = new TestClientProvider().Client)
    {
        var response = await client.PostAsync("/api/employee"
                , new StringContent(
                JsonConvert.SerializeObject(new Employee()
            {
                Address = "Test",
                FirstName = "John",
                LastName = "Mak",
                CellPhone = "111-222-3333",
                HomePhone = "222-333-4444"
            }),
            Encoding.UTF8,
            "application/json"));

        response.EnsureSuccessStatusCode();

        response.StatusCode.Should().Be(HttpStatusCode.OK);
    }
}
After I run the test again, I will see that even the POST test is a success.

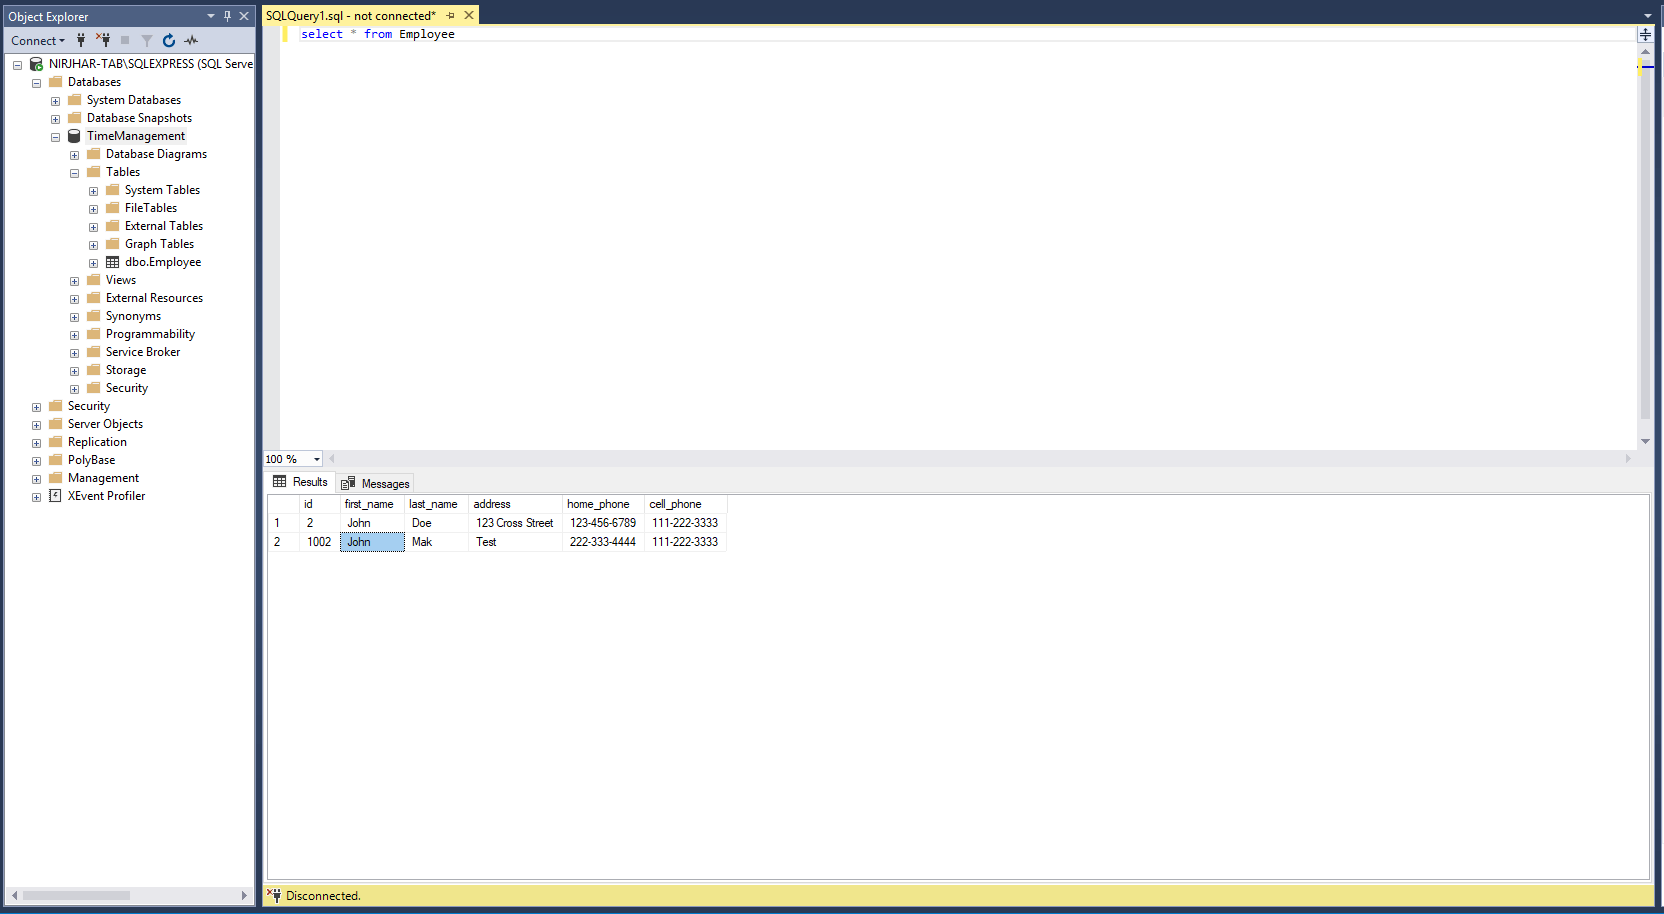
And finally to verify if the data is properly added to the database, I will run a select on the Employee table to see the newly entered data.

Conclusion
In conclusion, integration testing becomes a breeze using TestServer. And adding FluentAssertions for the assertion makes better readable tests.
I have a video with the steps followed for creating the application, here is the link to the YouTube video.
References
Integration testing blog: http://softwaretestingfundamentals.com/integration-testing/
FluentAssertions: http://fluentassertions.com/
Json.NET: https://www.newtonsoft.com/json