Hello everyone, welcome back to .Net Core Central. Today I am going to build a streaming application using ASP.Net Core and Kafka. This post is the first of the two post series in streaming in .Net Core. And I will be using Apache Kafka as the streaming platform.
I will continue with the same .Net Core solution, that I have created in my post Creating First ASP.Net Core Web API Application. So lets get started.
What is Apache Kafka
Apache Kafka is a distributed streaming platform. And it provides following three key capabilities:
- Publish and subscribe to streams of records
- Store streams of record in a fault tolerant way
- Let’s application process streams of records as they appear
Kafka runs as a cluster on one or more servers. And in Kafka, records are stored in categories called topics, where each record has a key, a value and a timestamp.
There are two main broad categories of applications where Kafka can be used.
- building real-time fault tolerant streaming data pipeline.
- Building real-time fault tolerant streaming applications.
Kafka has four core API’s, Producer, Consumer, Streams and Connector. For this post, I will be focusing only on Producer and Consumer. I will be using built in Producer and create .Net Core Consumer. In my next post, I will be creating .Net Core Producer.
Installing Kafka and its dependencies
Kafka has dependency on Java Runtime and Zookeeper. Hence, before I install Kafka, I will have to install JRE8 and Zookeeper. Also Zookeeper and Kafka uses .gz compression. As a result 7zip also needs to be installed to extract these files.
7zip Installation
For installing 7zip, I first download the version “7-Zip for 64-bit Windows x64 (Intel 64 or AMD64)” from the website http://www.7-zip.org/download.html and installed it.
JRE 8 Installation
I downloaded and installed the Windows x64 Offline version from the oracle website http://www.oracle.com/technetwork/java/javase/downloads/jre8-downloads-2133155.html .
After JRE is installed, first of all, I created a system environment variable named “JAVA_HOME” and provided the path of the JRE install. Also I updated the system environment variable Path, and appended “%JAVA_HOME%\bin” in the end. This will enable the use of Java command from any path in command prompt.
Zookeeper Installation
Anter 7zip and JRE is installed, I downloaded the latest version of the Zookeeper from the Zookeeper website http://zookeeper.apache.org/releases.html . After downloading, I extracted the downloaded file into “C:\zookeeper-3.4.10” folder using 7zip.
Furthermore I changed the file “zoo_sample.cfg” inside of the folder “C:\zookeeper-3.4.10\config” to “zoo.cfg”. Since I am not using anything fancy here, therefore I am going to use the default configuration. The only thing I changed in the “zoo.cfg” file is the location of the “dataDir”. I changed it from default value to “/data”.
Finally, I added a new system environment variable “ZOOKEEPER_HOME” with the path to the Zookeeper installation folder “C:\zookeeper-3.4.10”. Also updated the Path system environment variable to append “%ZOOKEEPER_HOME%\bin” to the end.
Installing Kafka
From the Kafka website http://kafka.apache.org/downloads.html I downloaded “Scala 2.11 – kafka_2.11-1.0.0.tgz (asc, sha512)” binary file. After downloading, I extracted the downloaded file into “C:\Kafka”.
In addition to that I edited the “server.properties” file and updated “log.dir” to use “/kafka_logs” instead of the default folder.
Running Kafka
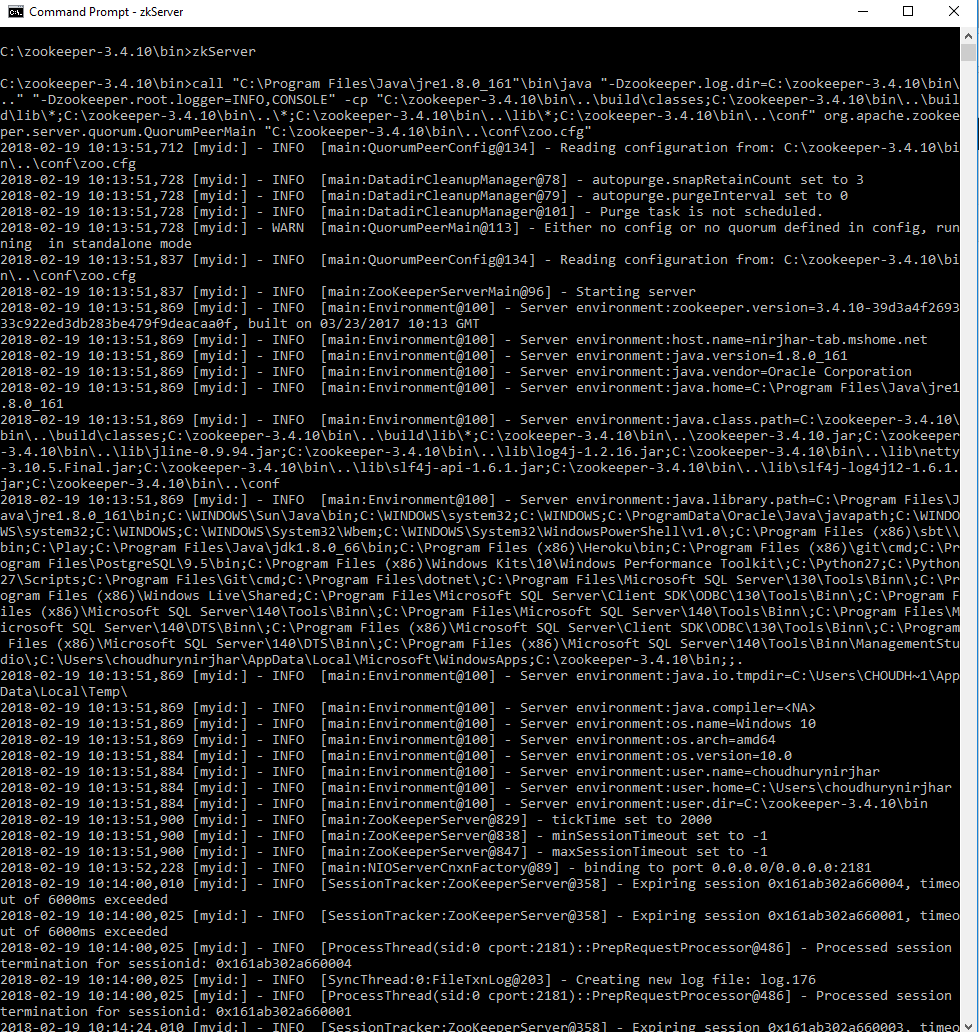
First of all, I will run the Zookeeper server. For running Zookeeper server, I will open up a command prompt. And navigate to “C:\zookeeper-3.4.10\bin”. And type command “zkserver” and hit enter. As a result the Zookeeper server will be started.
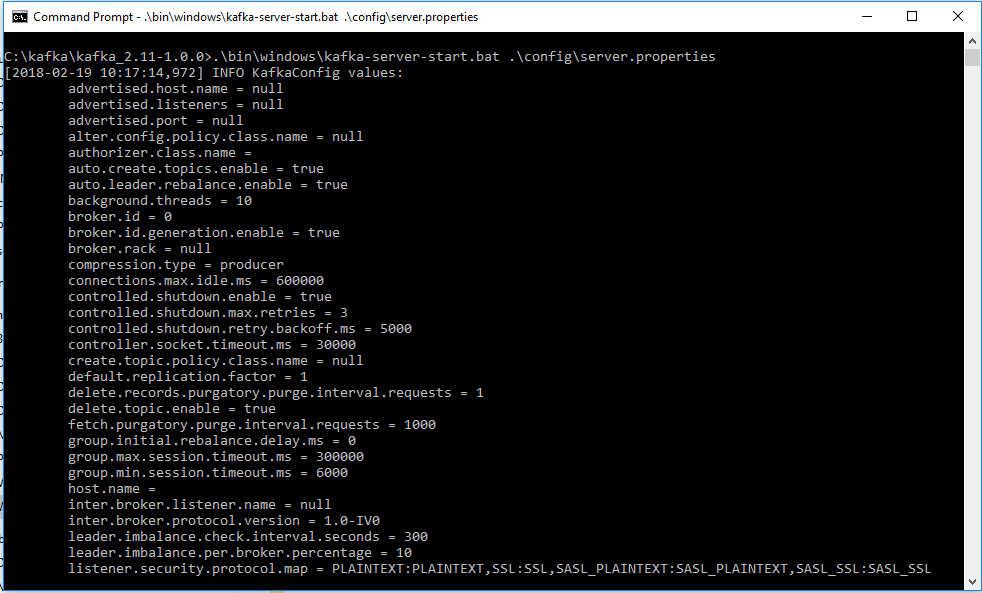
After Zookeeper server is started, I will open up another command prompt window. And navigate to “c:\kafka\kafka_2.11-1.0.0\”. And type command “.\bin\windows\kafka-server-start.bat ./config/server.properties”. As a result Kafka will be started.
Creating Kafka topic
First of all, I will create a topic and name it “timemanagement_booking”. This is the topic I will use for publishing data. Also my consumer will be subscribing to this topic.
For creating a topic, I will open up another command prompt. And navigate to “c:\kafka\kafka_2.11-1.0.0\bin\windows”. Finally type command “kafka-topics.bat –create –zookeeper localhost:2181 –replication-factor 1 –partitions 1 –topic timemanagement_booking” and hit enter. As a result a new topic named “timemanagement_booking” will be created.
In the command, there is one property most noteworthy. The property “replication-factor”, which determines how many nodes the topic will be replicated. Since I have only one instance Kafka installed on my PC. Hence I will use 1 for “replication-factor”.
Testing Kafka using inbuilt Producer/Consumer
First of all, I will have to make sure that the Kafka is functioning properly without any issues. Hence, I will use the built in Producer and Consumer applications. And check if the publish/subscribe is working as expected.
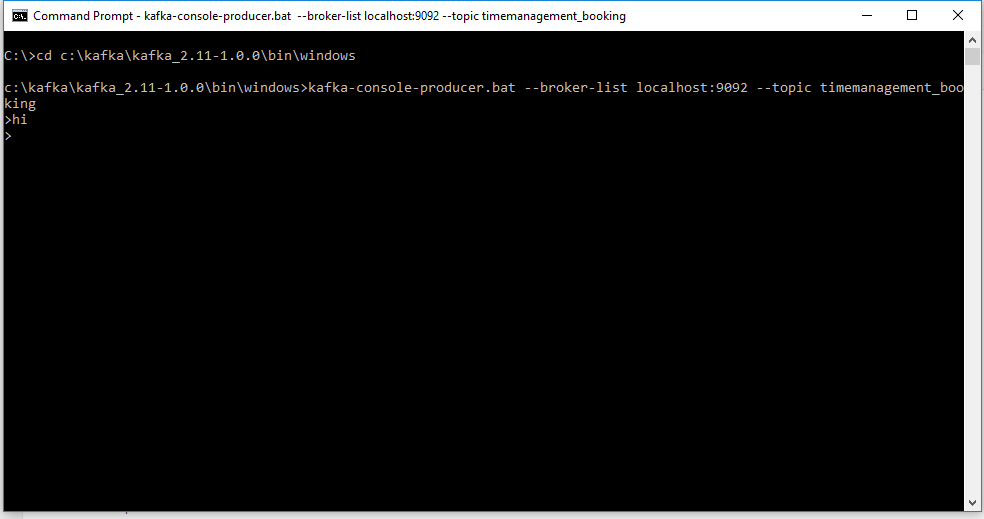
For running Producer, I will open up another command prompt. And navigate to “c:\kafka\kafka_2.11-1.0.0\bin\windows”. And type command “kafka-console-producer.bat –broker-list localhost:9092 –topic timemanagement_booking” and press enter. As a result, a new instance of producer will be started.
In addition to running Producer, I will have to run the Consumer as well. Hence, I will open up another command prompt. And navigate to “c:\kafka\kafka_2.11-1.0.0\bin\windows”. And type command “kafka-console-consumer.bat –zookeeper localhost:2181 –topic timemanagement_booking” and hit enter. As a result, a new instance of consumer will be started.
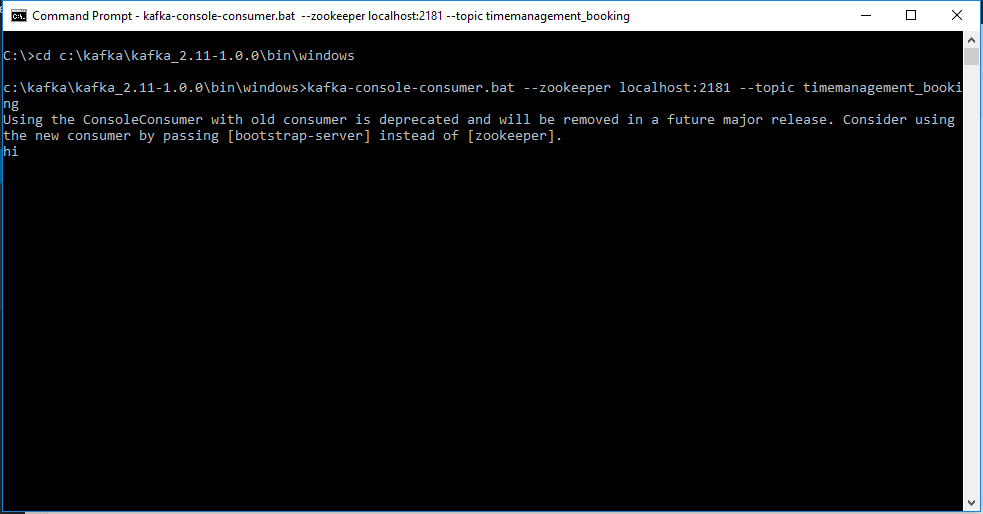
Finally when both Producer and Consumer are up and running, I will type a message “Hi” in the producer, and I can see its printed out in the consumer window.
Now that the Kafka infrastructure is working as expected, it is time to create a .Net Core Consumer.
Creating .Net Core Consumer
Create new Consumer Project
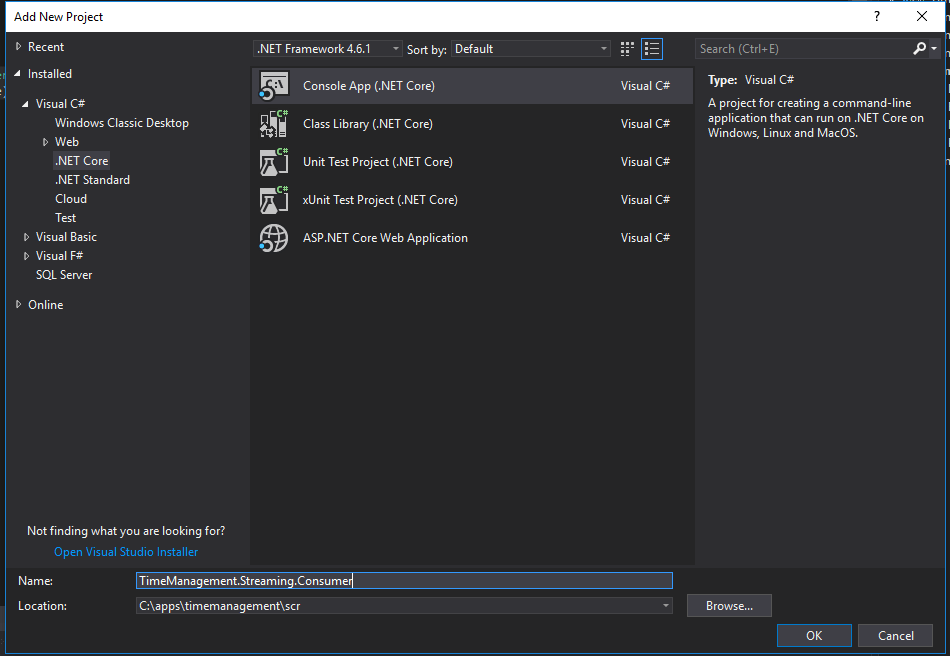
First of all I will open the TimeManagement application solution in Visual Studio 2017. After the solution is opened, I am going to right click on the solution and select “Add” -> “New Project“. This will open up the New Project model window. In the New Project model window, I am going to select “.Net Core” -> “Console App (.NET Core)” and give the name of the project “TimeManagement.Streaming.Consumer” and click “OK“.
Adding Nuget Package
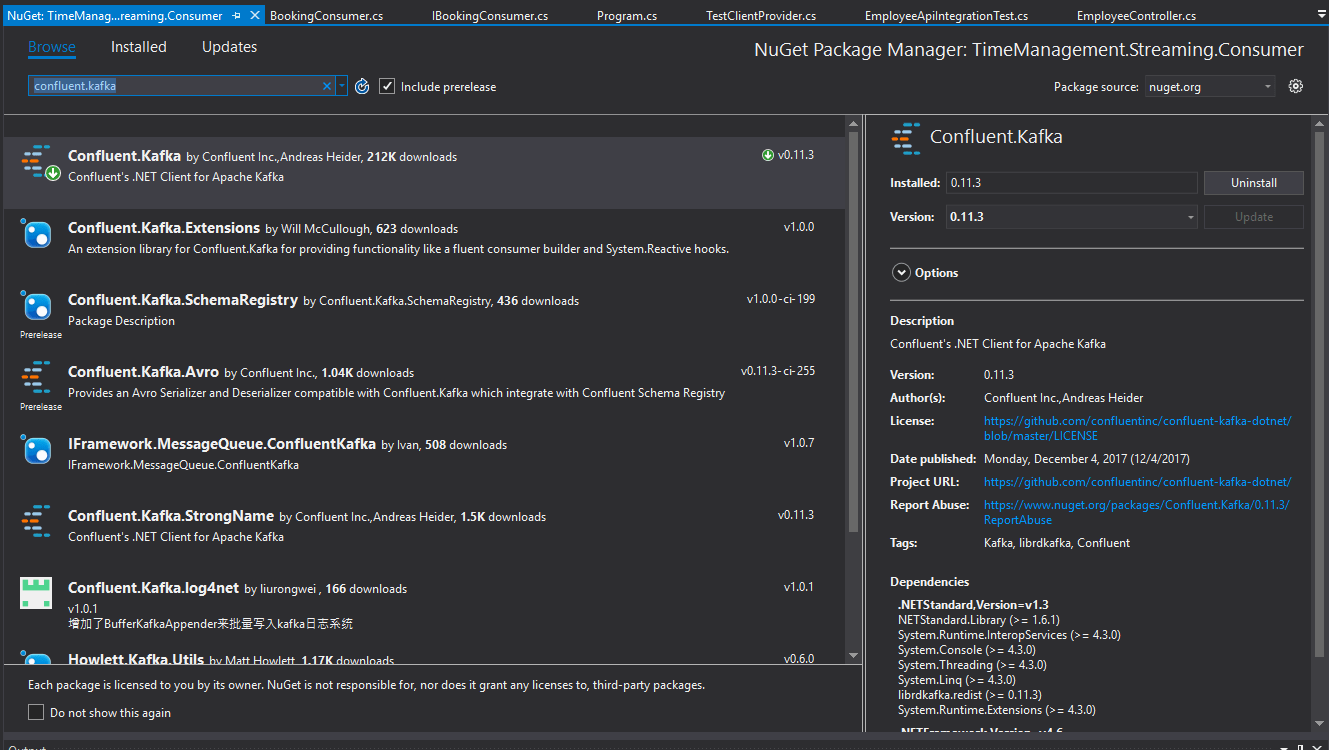
After the project is created I will install nuget package for Kafka “Confluent.Kafka”. Hence I will right click on the project and then open the Manage Nuget Packages option. In the Package Manager window I will go to the Browse tab and search for Confluent.Kafka and install it.
IBookingConsumer
After the nuget package is installed, I will create a new interface IBookingConsumer, which will have the contract for listening to the Kafka stream. It will have a single method Listen, which returns void and takes an Action delegate with string as its single input parameter.
public interface IBookingConsumer
{
    void Listen(Action message);
}
BookingConsumer
Finally, I will create the implementation class BookingConsumer. And BookingConsumer will be connecting and listening to Kafka stream. Also the BookingConsumer will implement the IBookingConsumer interface.
Furthermore inside BookingConsumer class, I will import the Confluent.Kafka and Confluent.Kafka.Serialization namespaces. Because I need these namespaces for accessing Kafka API.
For the implementation of Listen method, I will first create a configuration object, which is an instance of Dictionary with key as string and value as object. This configuration object will be passed to the constructor of the Consumer class of the Confluent.Kafka assembly.
After creating the Consumer instance, I will Subscribe to the “timemanagement_booking” topic. And attach an callback to the OnMessage event. And when the event occurs, I will callback the caller of the function passing the value from the Kafka stream. Finally I will create a while loop, where I will poll Kafka every 10 millisecond.
public class BookingConsumer : IBookingConsumer
{
    public void Listen(Action message)
    {
        var config = new Dictionary
        {
            {"group.id","booking_consumer" },
            {"bootstrap.servers", "localhost:9092" }
            { "enable.auto.commit", "false" }
        };

        using(var consumer = new Consumer(config, null, new StringDeserializer(Encoding.UTF8)))
        {
            consumer.Subscribe("timemanagement_booking");
            consumer.OnMessage += (_, msg) => {
                message(msg.Value);
        };

        while (true)
        {
            consumer.Poll(100);
        }
    }
}
Running .Net Core Kafka Consumer
So now that the .Net Core Kafka consumer code is complete, therefore I will implement the Main method of the Program.cs. And inside the Main method I will create a new instance of BookingConsumer. And call the Listen method of the BookingConsumer passing Console.Writeline method. Finally I will set the Timemanagement.Streaming.Consumer as startup project and press Ctrl+F5 to run the application.
class Program
{
    static void Main(string[] args)
    {
        var bookingConsumer = new BookingConsumer();
        bookingConsumer.Listen(Console.WriteLine);
    }
}
Testing .Net Core Kafka Consumer
Since my .Net Core Kafka consumer is now running, hence I will open the command prompt where the built in Producer is running. Finally I will type a message “Hello booking consumer” and press enter. As a result I will see the message appearing immediately in the .Net Core consumer console.
Conclusion
In conclusion, implementing real-time streaming application using .Net Core and Kafka is extremely simple and easy. As you can see, it’s very straightforward creating a streaming application using Confluent.Kafka nuget package. In my next post, I will create a .Net Core Producer as well.
I have a video with the steps followed for installing Kafka and creating the .Net Core consumer. Attached is the link to the YouTube video.
References
JRE Download: http://www.oracle.com/technetwork/java/javase/downloads/jre8-downloads-2133155.html
7zip Download: http://www.7-zip.org/
Zookeeper Download: https://www.apache.org/dyn/closer.cgi/zookeeper/
Kafka Download: https://kafka.apache.org/downloads
Confluent.Kafka Nuget: https://github.com/confluentinc/confluent-kafka-dotnet/