Hello everyone, welcome back to .Net Core Central. In addition to my last post, today I am going to continue with the CRUD application using ASP.Net Core Web API and Dapper. This is the continuation of the previous post ASP.Net Core Web API Application with Dapper – Part 1. If you have not read the previous post, I strongly suggest you do. In this post I will be implementing Create, Update and Delete of Employee into the TimeManagement database.
Database Connection To Configuration
First of all, I will be moving the database connection string into configuration. Currently the connection string is hard coded in the StartUp class’s ConfigureServices function. Further, I will copy the connection string from the ConfigureServices method and paste it in the appsettings.json file. In addition, in appsettings.json I will create a new node “ConnectionString”. Finally, inside the “ConnectionString” node, I will create an attribute named “TimeManagement”, and paste the connection string there.
{
  "Logging": {
    "IncludeScopes": false,
    "Debug": {
      "LogLevel": {
        "Default": "Warning"
      }
    },
    "Console": {
      "LogLevel": {
        "Default": "Warning"
      }
    }
  },
  "ConnectionString": {
    "TimeManagement": "Persist Security Info = False; Integrated Security = true; Initial Catalog = TimeManagement; server = Nirjhar-Tab\\SQLEXPRESS"
  }
}
Accessing Connection String From Configuration
For accessing the connection string from the configuration, I will use ConfigurationBuilder object. First of all, I will use the SetBasePath method of the ConfigurationBuilder object, we will let the builder know where to look for the file. Secondly, in the AddJsonFile method we will provide the file name “appsettings.json”. Finally, calling the Build method on the ConfigurationBuilder will provide the configuration object. We will use the indexer on the IConfigurationRoot object to get the connection string from configuration file.
public class Startup
{
    public Startup(IConfiguration configuration)
    {
        Configuration = configuration;
    }

    public IConfiguration Configuration { get; }

    // This method gets called by the runtime. Use this method to add services to the container.
    public void ConfigureServices(IServiceCollection services)
    {
        services.AddMvc();

        var builder = new ConfigurationBuilder().SetBasePath(Directory.GetCurrentDirectory()).AddJsonFile("appsettings.json");
        var config = builder.Build();

        services.AddTransient(f => new EmployeeProvider(config["ConnectionString:TimeManagement"]));
    }

    // This method gets called by the runtime. Use this method to configure the HTTP request pipeline.
    public void Configure(IApplicationBuilder app, IHostingEnvironment env)
    {
        if (env.IsDevelopment())
        {
            app.UseDeveloperExceptionPage();
        }

        app.UseMvc();
    }
}
Insert using Dapper
For inserting employee records into the database, we will use a new class EmployeeProcessor. The EmployeeProcessor will implement the interface IEmployeeProcessor. IEmployeeProcessor have Create, Delete and Update methods to support the Create, Delete and Update functions on the employee table.
public interface IEmployeeProcessor
{
    void Create(Employee employee);

    void Update(Employee employee);

    void Delete(int employeeId);
}
For the Create method, we will be using the Execute extension method on the IDbConnection provided by Dapper. And we will pass the SQL Insert statement and a dynamic object containing all the parameters needed for the insert statement as a parameter to the Execute method.
public class EmployeeProcessor : IEmployeeProcessor
{
    private readonly string connectionString;

    public EmployeeProcessor(string connectionString)
    {
        this.connectionString = connectionString;
    }

    public void Create(Employee employee)
    {
        using (var connection = new SqlConnection(connectionString))
        {
            connection.Execute("INSERT INTO Employee (first_name, last_name, address, home_phone, cell_phone) VALUES (@FirstName, @LastName, @Address, @HomePhone, @CellPhone)",
                new { employee.FirstName, employee.LastName, employee.Address, employee.HomePhone, employee.CellPhone });
        }
    }

    public void Delete(int employeeId)
    {
    }

    public void Update(Employee employee)
    {
    }
}
Update Using Dapper
Update method is almost exactly same as insert. The only difference is due to SQL Update statement and in addition to that a Where condition. The where condition is needed for finding exact employee to update. And finally we will be using the same Execute extension method on the IDbConnection for update as well.
public class EmployeeProcessor : IEmployeeProcessor
{
    private readonly string connectionString;

    public EmployeeProcessor(string connectionString)
    {
        this.connectionString = connectionString;
    }

    public void Create(Employee employee)
    {
        using (var connection = new SqlConnection(connectionString))
        {
            connection.Execute("INSERT INTO Employee (first_name, last_name, address, home_phone, cell_phone) VALUES (@FirstName, @LastName, @Address, @HomePhone, @CellPhone)",
                new { employee.FirstName, employee.LastName, employee.Address, employee.HomePhone, employee.CellPhone });
        }
    }

    public void Delete(int employeeId)
    {
    }

    public void Update(Employee employee)
    {
        using (var connection = new SqlConnection(connectionString))
        {
            connection.Execute("UPDATE Employee SET first_name =@FirstName, last_name =@LastName, address=@Address, home_phone=@HomePhone, cell_phone=@CellPhone WHERE id=@Id",
                new { employee.FirstName, employee.LastName, employee.Address, employee.HomePhone, employee.CellPhone, employee.Id });
        }
    }
}
Delete Using Dapper
And finally the Delete method implementation is also same as Create and Update. The only difference is due to the SQL Delete statement. And the Delete method needs just the id of the employee that needs to be deleted.
public class EmployeeProcessor : IEmployeeProcessor
{
    private readonly string connectionString;

    public EmployeeProcessor(string connectionString)
    {
        this.connectionString = connectionString;
    }

    public void Create(Employee employee)
    {
        using (var connection = new SqlConnection(connectionString))
        {
            connection.Execute("INSERT INTO Employee (first_name, last_name, address, home_phone, cell_phone) VALUES (@FirstName, @LastName, @Address, @HomePhone, @CellPhone)",
                new { employee.FirstName, employee.LastName, employee.Address, employee.HomePhone, employee.CellPhone });
        }
    }

    public void Delete(int employeeId)
    {
        using (var connection = new SqlConnection(connectionString))
        {
            connection.Execute("DELETE FROM Employee WHERE id=@Id",
                new { Id = employeeId});
        }
    }

    public void Update(Employee employee)
    {
        using (var connection = new SqlConnection(connectionString))
        {
            connection.Execute("UPDATE Employee SET first_name =@FirstName, last_name =@LastName, address=@Address, home_phone=@HomePhone, cell_phone=@CellPhone WHERE id=@Id",
                new { employee.FirstName, employee.LastName, employee.Address, employee.HomePhone, employee.CellPhone, employee.Id });
        }
    }
}
Testing Using Postman
For testing we will be using Postman, because it is very simple yet powerful tool for API testing. Postman can be downloaded and installed from Postman Download Link.
Testing POST (Create)
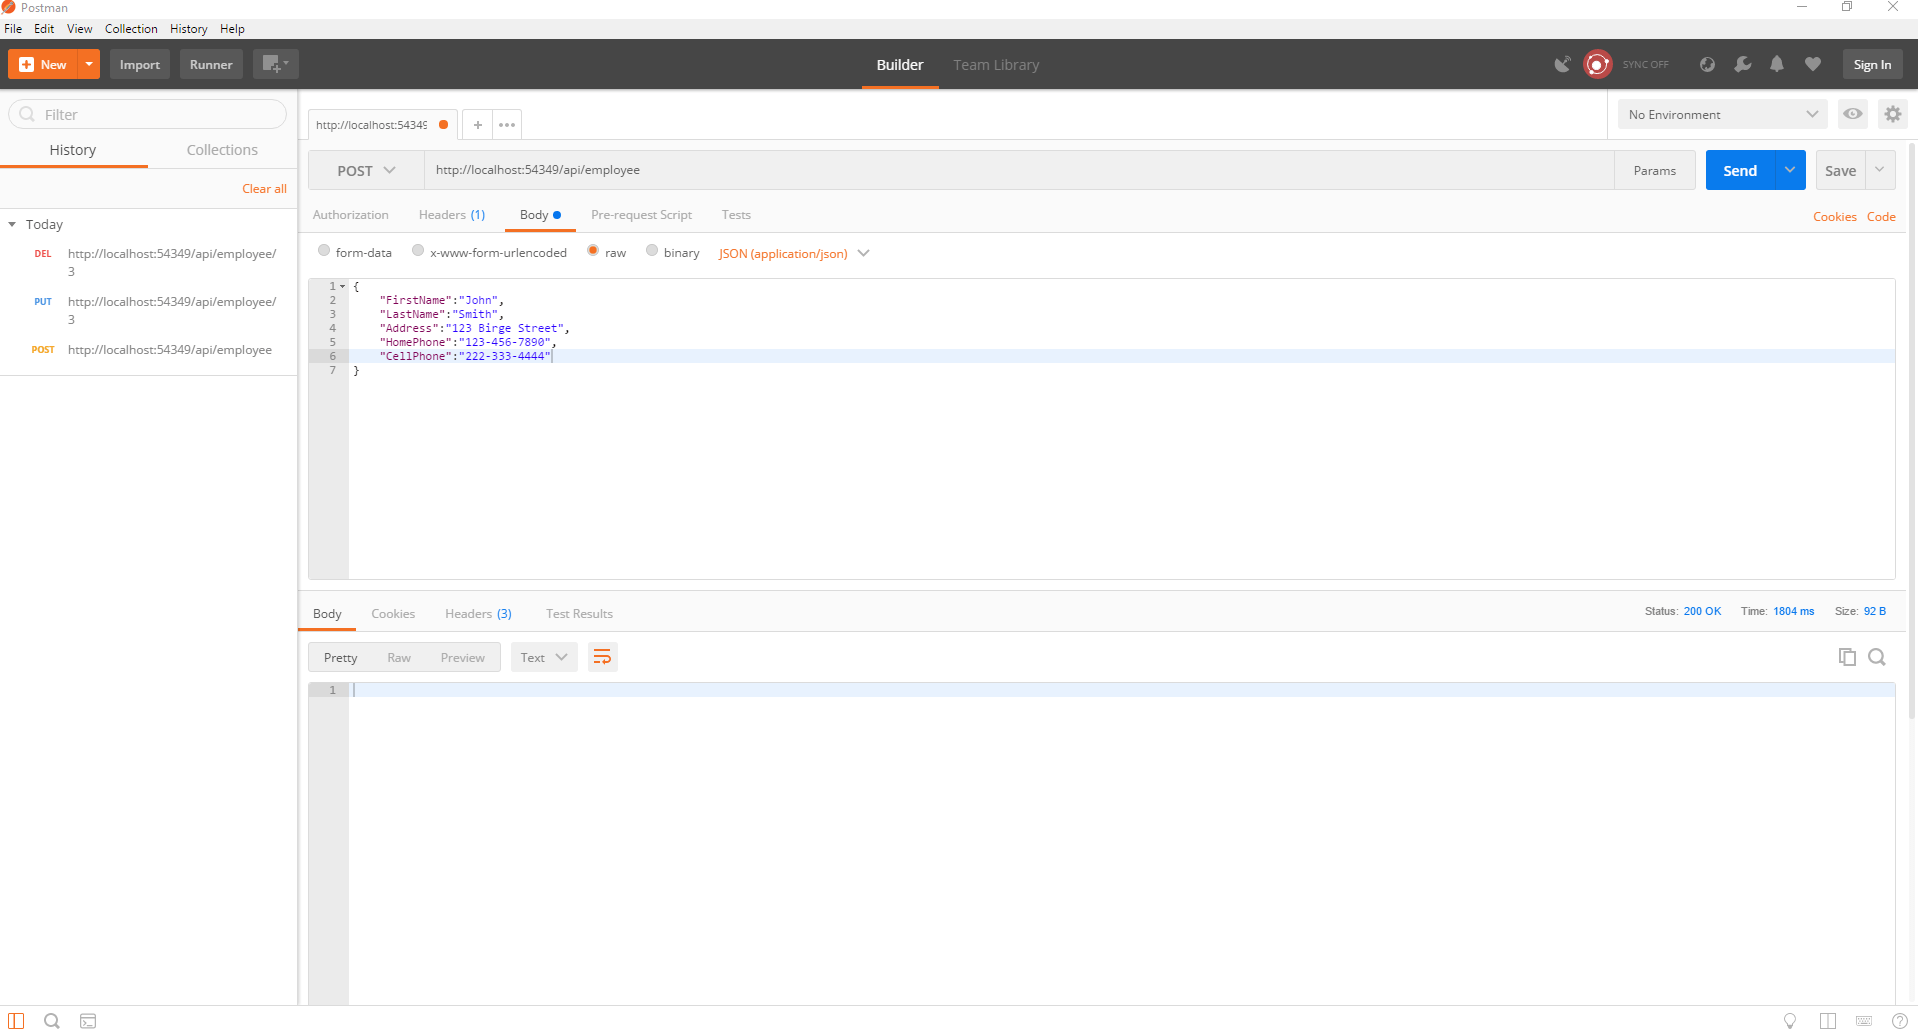
First of all we will be testing Create method. For testing the Create method, we will select POST option and in addition we will provide the url to employee end point. And in the body we will provide the JSON structure for Employee object. And finally select the JSON (application/json) and click Send.
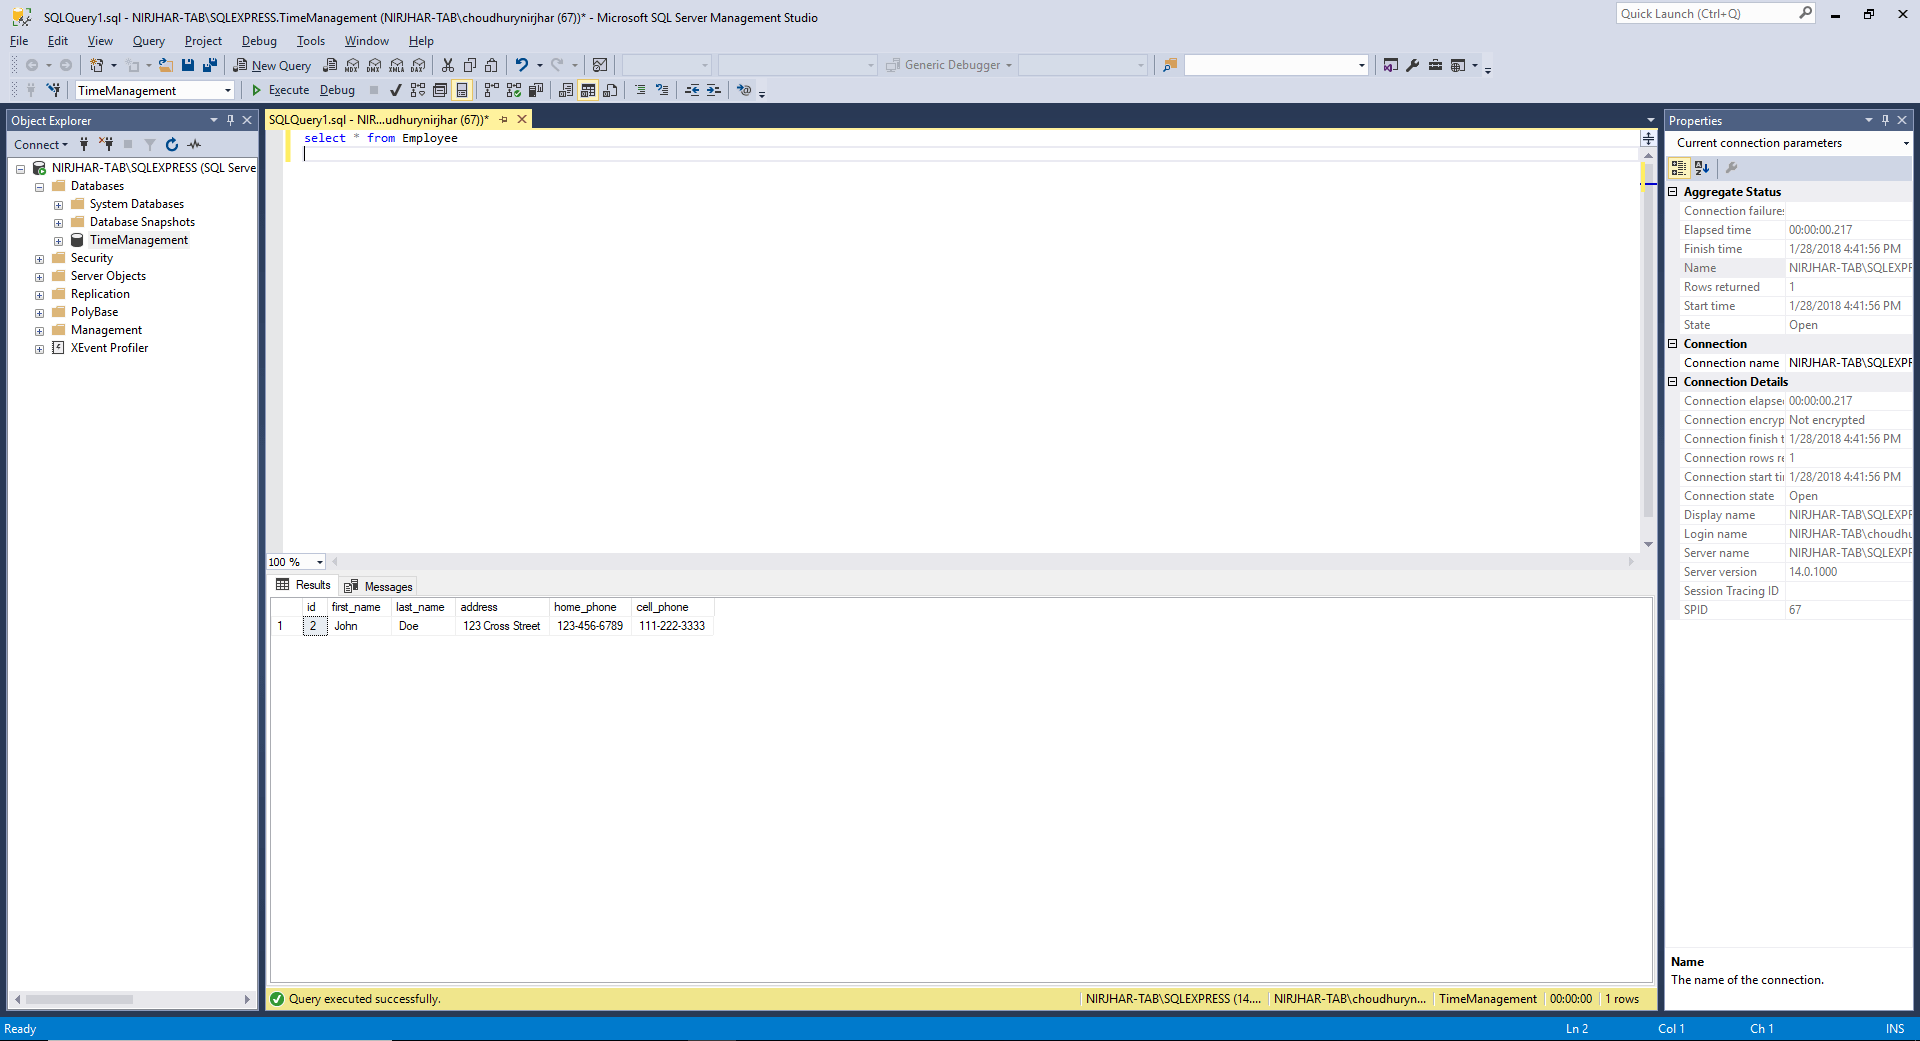
To verify if the Create was successful or not I am going to open the SQL Server Management Studio. I am going to run the select query on the Employee table “SELECT * FROM Employee“. Once I execute the Select statement, I can see the newly created record in the Employee table.

Testing PUT (Update)
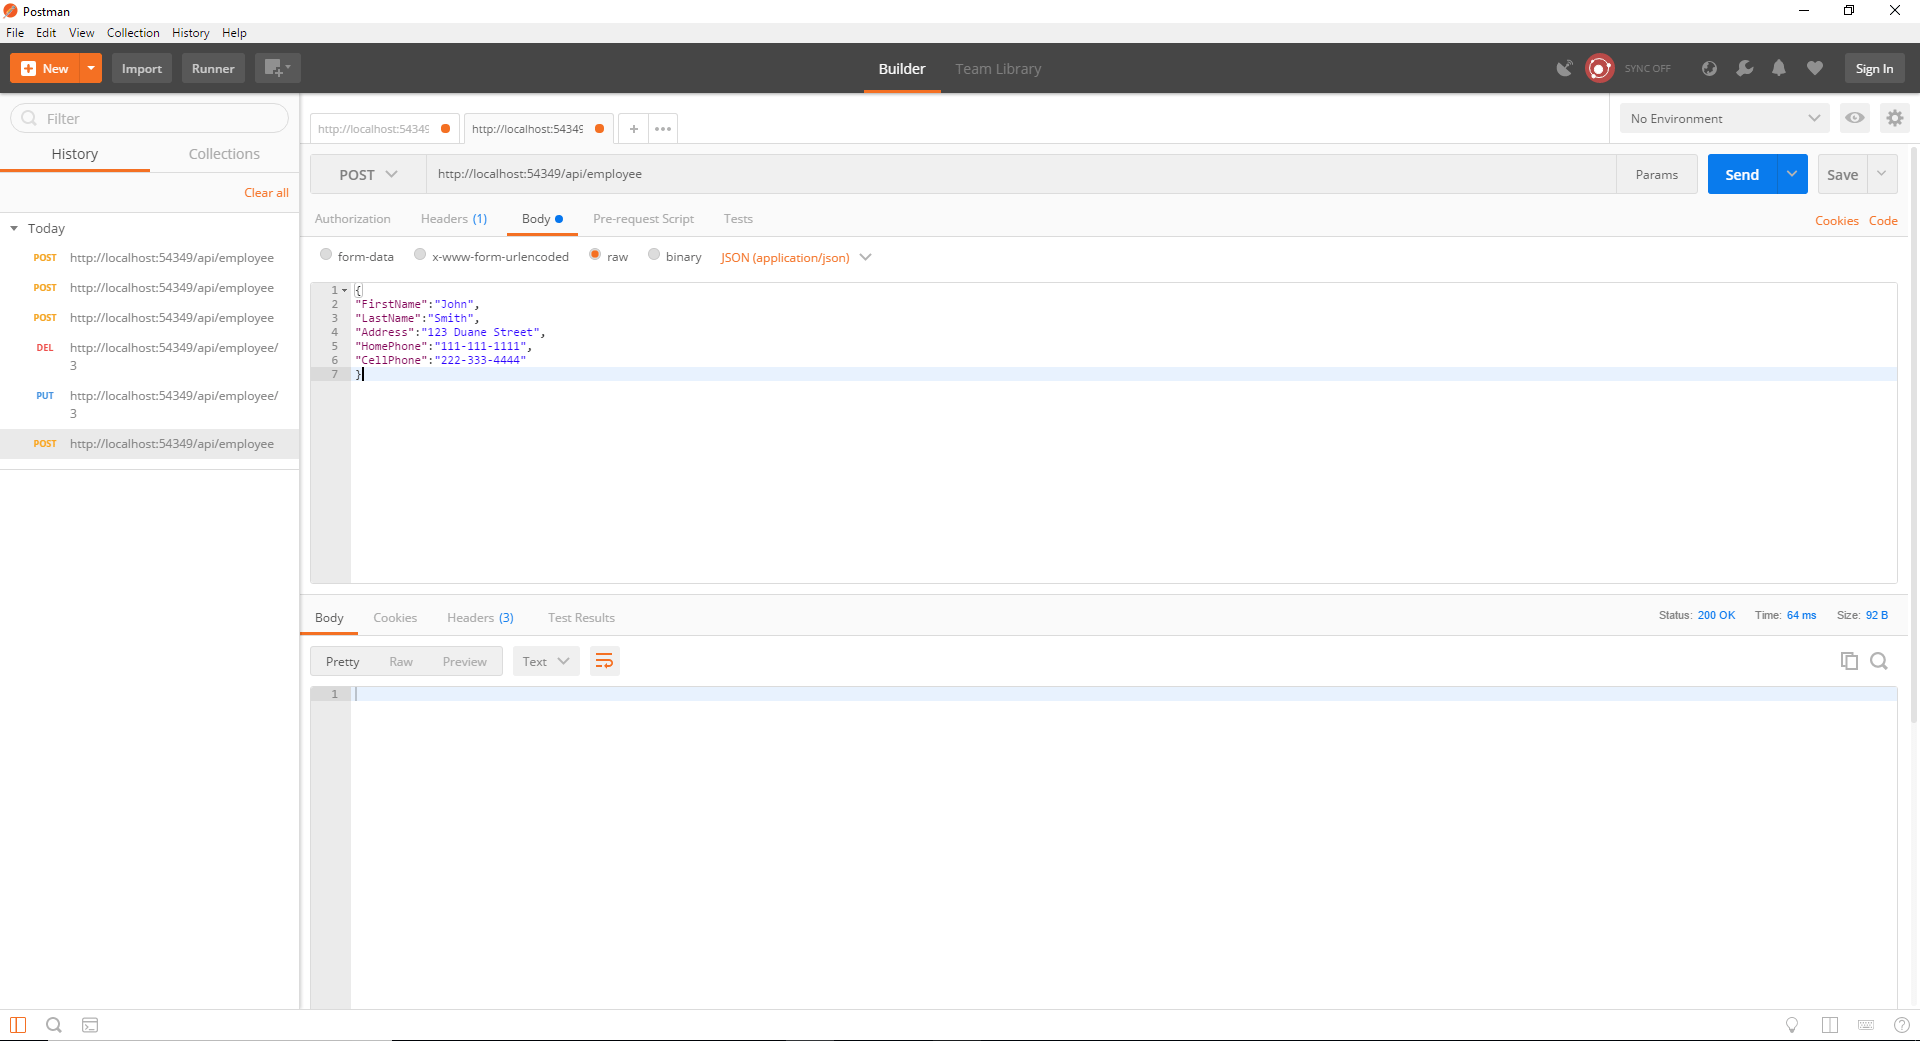
For testing the Update method, we will select the PUT option and provide the url of the employee end point, along with the id of the employee to be updated. The JSON structure and other selections will remain same as in POST. We will just update the JSON and change the values for the Address and the Home Phone.
To verify if the Update was successful or not I am going run the select query on the Employee table “SELECT * FROM Employee“. Once I execute the Select statement, I can see the records with id 3 are updated with the new values in the Employee table.
Testing DELETE (Delete)
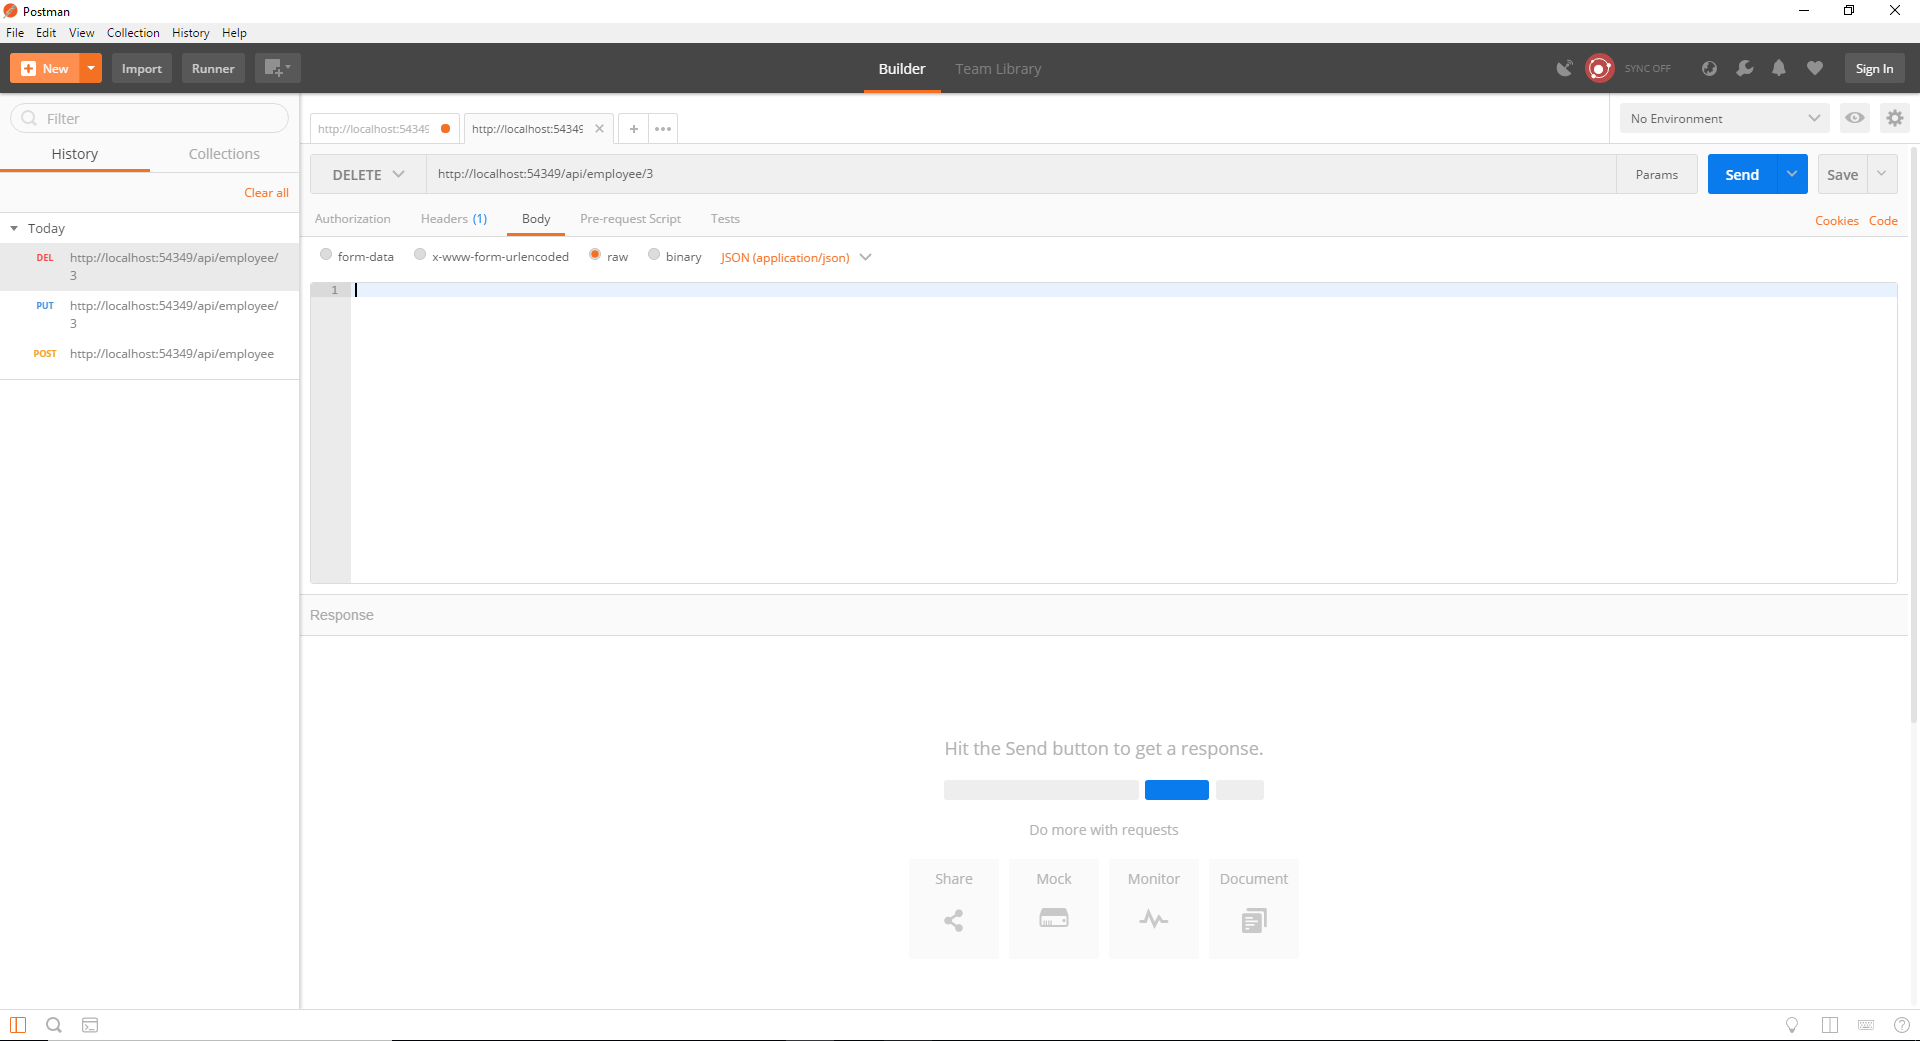
For testing the Delete method, we will select the DELETE option and provide the url of the employee end point, along with the id of the employee to be deleted. We will remove the JSON structure from the body, as it is not needed. Rest of the selection will remain same as in POST and PUT.
To verify if the Delete was successful or not I am going run the select query on the Employee table “SELECT * FROM Employee“. Once I execute the Select statement, I can see the records with id 3 is not longer available in the Employee table.
Conclusion
Most importantly, I find Dapper as extremely simple to implement Create, Update and Delete functionality. In addition to just what I have shown here, I have used Dapper in multiple production applications, never had any issues whatsoever. Above all, to me, this is one of the most simplest micro ORM out there.
In my next post I will start implementing some business logic classes in the Time Management solution and go through the Unit Testing.
In addition, I have a video with the steps followed for creating the application, here is the link to the YouTube video.
References
Postman download link: getpostman.com/
Tutorial for Dapper: http://dapper-tutorial.net/dapper
GitHub for Dapper: https://github.com/StackExchange/Dapper
Dapper Nuget package: https://www.nuget.org/packages/Dapper
ASP.Net Core Web API Application with Dapper – Part 1