Introduction
When it comes to authenticating users in web APIs, basic authentication offers a straightforward mechanism.
In basic authentication, the client, which is an application attempting to access an authenticated web API, must provide the username and password combination in the HTTP header of the HTTP request.
On the server side, these credentials are used to validate the user. While basic authentication is easy to implement, it has certain security limitations and is not as secure as other authentication mechanisms like OAuth or JWT.
However, for simple web applications, basic authentication can be a useful option. In this blog post, we will explore the process of creating a basic authentication handler for a web API using ASP.NET, and demonstrate how to test it using Postman.
Creating the Basic Authentication Handler
To begin, let’s assume we have a web API created using the default template of ASP.NET, which includes a weather controller. Our goal is to implement basic authentication for this service.
First, we need to create a new middleware that will handle the basic authentication. If you’re new to creating middleware in ASP.NET, I have a video tutorial that explains the process (link here).
Create the Basic Authentication Handler class
Name the class “BasicAuthHandler.” Define a constructor that takes a request delegate (usually named “next”) and a realm.
Create local variables for both parameters. Implement the InvokeAsync method.
public class BasicAuthHandler
{
    private readonly RequestDelegate next;
    private readonly string relm;

    public BasicAuthHandler(RequestDelegate next, string relm)
	{
        this.next = next;
        this.relm = relm;
    }

    public async Task InvokeAsync(HttpContext context)
    {
        if (!context.Request.Headers.ContainsKey("Authorization"))
        {
            context.Response.StatusCode = 401;
            await context.Response.WriteAsync("Unauthorized");
            return;
        }

        // Basic userid:password
        var header = context.Request.Headers["Authorization"].ToString();
        var encodedCreds = header.Substring(6);
        var creds = Encoding.UTF8.GetString(Convert.FromBase64String(encodedCreds));
        string[] uidpwd = creds.Split(':');
        var uid = uidpwd[0];
        var password = uidpwd[1];

        if(uid != "john" || password != "password")
        {
            context.Response.StatusCode = 401;
            await context.Response.WriteAsync("Unauthorized");
            return;
        }

        await next(context);
    }
}
ASP.NET Middleware explanation
ASP.NET middleware works with a convention-based mechanism, where it looks for the InvokeAsync method to execute when the middleware is configured with a class. Implement the InvokeAsync method, which takes an HttpContext parameter.
Start by checking if the authorization header is missing in the request. If the header is missing, set the response status code to 401 (unauthorized) and write “Unauthorized” as the response content.
If the authorization header is present, extract the encoded user ID and password from the header. Parse the encoded credentials by removing the “Basic ” prefix (the space is the sixth character).
Decode the credentials from Base64 and split them into user ID and password. Perform the necessary user ID and password validation.
For demonstration purposes, a hard-coded implementation can be used (e.g., check if the user ID is “John” and the password is “password”).
If the user ID and password match, allow the request to continue to the next middleware in the pipeline.
Adding the Basic Authentication Middleware
Once the Basic Authentication middleware is implemented, we can add it to our application pipeline.
Open the Startup.cs file of your ASP.NET application. In the Configure method, add the following line of code:
app.UseMiddleware<BasicAuthHandler>("Test");
Replace “test” with your desired realm or authentication realm identifier.
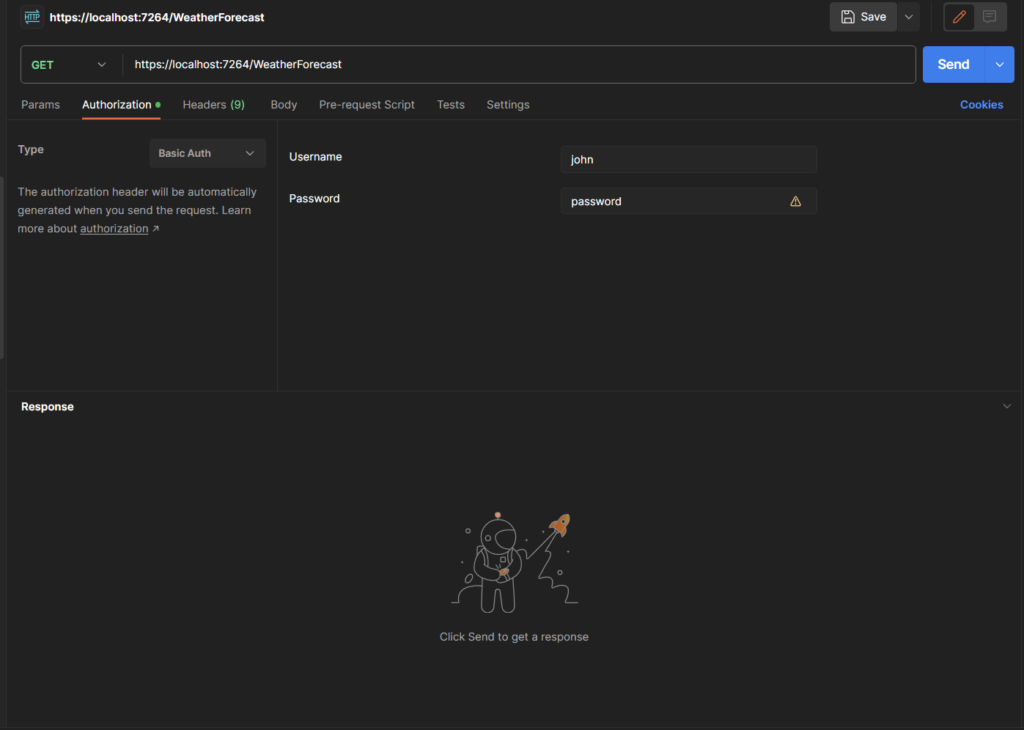
Testing Basic Authentication with Postman
To test the basic authentication mechanism, we can use Postman, a popular tool for API testing. Launch Postman and paste the URL of the weather forecast endpoint.
Go to the Authorization tab and select “Basic Auth.” Enter “John” as the username and “password” as the password. Execute the request and observe the response.
If the credentials are correct, you should receive a successful response. If the credentials are incorrect or missing, you will receive a 401 (unauthorized) response.
Conclusion
Implementing basic authentication in a web API is a straightforward process. Although basic auth has its security limitations, it can be a suitable choice for simple web applications.
By following the steps outlined in this blog post, you can create a basic authentication handler using ASP.NET and test it using Postman. Remember to consider more robust authentication mechanisms for applications with higher security requirements.
The YouTube link for the video demonstrating this implementation is here.