When doing the YouTube video for the last blog https://dotnetcorecentral.com/blog/sqlite-for-unit-testing-in-net-core/, I mentioned that I might do a post in NUnit. Hence, here it is, an introduction to NUnit as I dig through some of the features.
What is NUnit?
NUnit is a unit testing framework for .Net. It is probably the most popular unit testing framework in .Net. As of this post, it has more than 47 million downloads on Nuget.org.
It is extremely feature-rich. I would be covering a few of the features which I found very useful throughout my career.
New Class Library
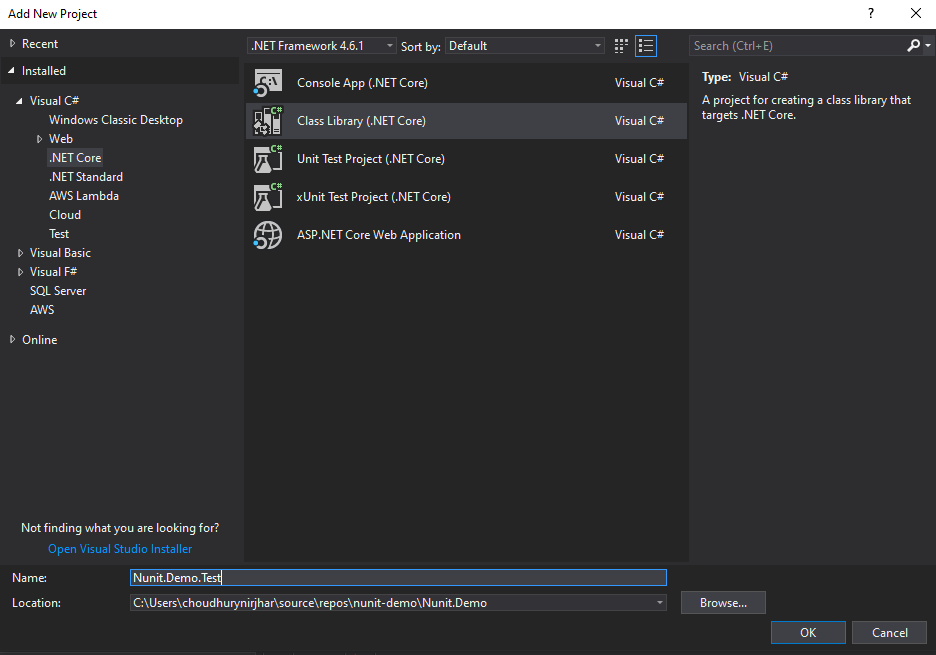
Firstly, I will create a new Class Library in .NET Core. Name the project as Nunit.Demo.

This project will have a simple Calculator class. Which will have just two methods, Addition and Subtraction.
using System;

namespace Nunit.Demo
{
    public class Calculator
    {
        public int Addition(int first, int second)
        {
            return first + second;
        }

        public int Subtraction(int first, int second)
        {
            if (first < second)
                throw new ArgumentException($"First number {first} is less than second number {second}");

            return first - second;
        }
    }
}
The Subtraction method is throwing an ArgumentException to write Exception test case.
NUnit Test Project
Secondly, I will create a new Class Library project to host the test code.

In this project, I will add the following Nuget packages for supporting tests project.
- NUnit
- NUnit3TestAdapter
- Microsoft.NET.Test.Sdk

Writing Tests
Next I will add a test class CalculatorTest to test the Calculator.
Firstly, we will create a method Test_Addition_With_Valid_Integer, which will have a test to validate a positive test case.
using NUnit.Framework;
using System;

namespace Nunit.Demo.Test
{
    [TestFixture]
    public class CalculatorTest
    {
        [Test]
        public void Test_Addition_With_Valid_Intigers()
        {
            var calc = new Calculator();
            var result = calc.Addition(3, 5);
            Assert.AreEqual(8, result);
        }
    }
}
TestFixure, Test and Assert
NUnit is an attribute-based testing framework. Which means everything is annotated using attributes for the testing framework to find out the test and execute them. Out of all the attributes available, the most common and must-have for a test to execute are TestFixure and Test.
TestFixture is added into a class to mark the class for testing. And Test is added to the method to mark the method for testing.
Assert class assists with assertions. It has many static methods. But AreEqual is probably one of the most widely used methods.
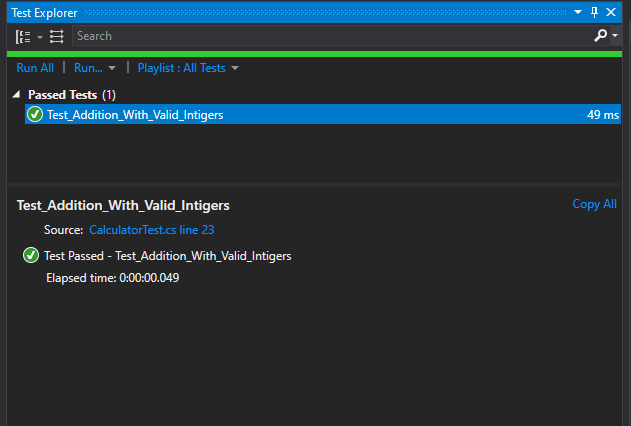
The output of the First Test

Ignoring a test
Another important feature is ignoring a test. And it can be done by using Ignore attribute.
using NUnit.Framework;
using System;

namespace Nunit.Demo.Test
{
    [TestFixture]
    public class CalculatorTest
    {
        [Test]
        public void Test_Addition_With_Valid_Intigers()
        {
            var calc = new Calculator();
            var result = calc.Addition(3, 5);
            Assert.AreEqual(8, result);
        }

        [Ignore("Ignore test")]
        public void Test_To_Ignore()
        {
        }
    }
}
In this case, when we run the test, we will not see the ignored test in the test window.
Batch Testing
NUnit framework provides a feature to test a single method with multiple test data. This is done using the TestCase attribute.
using NUnit.Framework;
using System;

namespace Nunit.Demo.Test
{
    [TestFixture]
    public class CalculatorTest
    {

        [Test]
        public void Test_Addition_With_Valid_Intigers()
        {
	    var calc = new Calculator();
            var result = calc.Addition(3, 5);
            Assert.AreEqual(8, result);
        }

        [TestCase(1,2,3)]
        [TestCase(2, 3, 5)]
        [TestCase(3, 4, 7)]
        public void Test_Addition_Multiple(int first, int second, int expectedresult)
        {
	    var calc = new Calculator();
            var calculated = calc.Addition(first, second);
            Assert.AreEqual(expectedresult, calculated);
        }

        [Ignore("Ignore test")]
        public void Test_To_Ignore()
        {
        }

    }
}
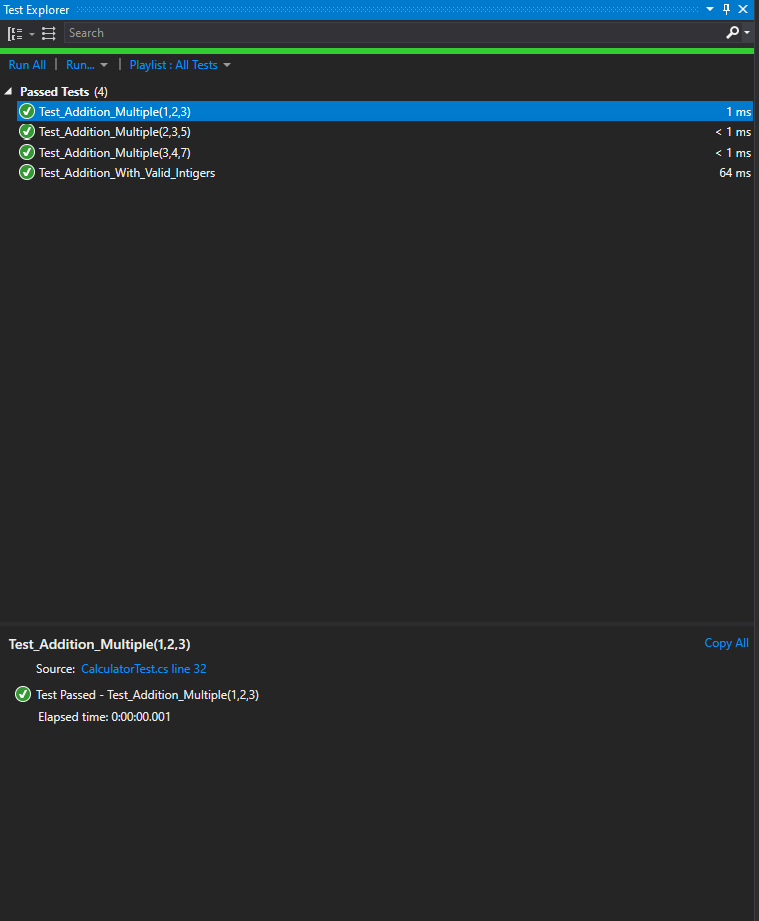
In the above code, the method Test_Addition_Multiple will execute three times. Since it is called with each parameter set each time, therefore, we will see three responses in the test window.

NUnit test for Exception
In addition to the features above; NUnit also provides API for Exception test. For instance, we can test the ArgumentException case of the Subtraction method.
using NUnit.Framework;
using System;

namespace Nunit.Demo.Test
{
    [TestFixture]
    public class CalculatorTest
    {
        [Test]
        public void Test_Addition_With_Valid_Intigers()
        {
            var calc = new Calculator();
            var result = calc.Addition(3, 5);
            Assert.AreEqual(8, result);
        }

        [Test]
        public void Test_Substraction_Argument_Exception()
        {
            var calc = new Calculator();
            Assert.Catch<SystemException>(() => calc.Subtraction(4, 5));
            Assert.Throws<ArgumentException>(() => calc.Subtraction(4, 5));
        }

        [TestCase(1,2,3)]
        [TestCase(2, 3, 5)]
        [TestCase(3, 4, 7)]
        public void Test_Addition_Multiple(int first, int second, int expectedresult)
        {
            var calc = new Calculator();
            var calculated = calc.Addition(first, second);
            Assert.AreEqual(expectedresult, calculated);
        }

        [Ignore("Ignore test")]
        public void Test_To_Ignore()
        {
        }

    }
}
In the above code, the method Test_Substraction_Argument_Exception tests the exception condition. There are two NUnit API that supports it.
Firstly, Assert.Catch, which can test specific exceptions or a derived one.
Secondly, Assert.Throws, which can test specific exception only.
Setup and Teardown
Setup and Teardown attributes are for the function to set up and teardown the test. I will update the Calculator class to implement IDisposable.
using System;

namespace Nunit.Demo
{
    public class Calculator : IDisposable
    {
        public int Addition(int first, int second)
        {
            return first + second;
        }

        public void Dispose()
        {
            // todo
        }

        public int Subtraction(int first, int second)
        {
            if (first < second)
                throw new ArgumentException($"First number {first} is less than second number {second}");

            return first - second;
        }
    }
}
Subsequently, I will update the test class with Setup and Teardown methods.
using NUnit.Framework;
using System;

namespace Nunit.Demo.Test
{
    [TestFixture]
    public class CalculatorTest
    {
        Calculator calc;
        [SetUp]
        public void Setup()
        {
            calc = new Calculator();
        }

        [TearDown]
        public void Teardown()
        {
            calc.Dispose();
        }

        [Test]
        public void Test_Addition_With_Valid_Intigers()
        {
            var result = calc.Addition(3, 5);
            Assert.AreEqual(8, result);
        }

        [Test]
        public void Test_Substraction_Argument_Exception() {
            Assert.Catch<SystemException>(() => calc.Subtraction(4, 5));
            Assert.Throws<ArgumentException>(() => calc.Subtraction(4, 5));
        }

        [TestCase(1,2,3)]
        [TestCase(2, 3, 5)]
        [TestCase(3, 4, 7)]
        public void Test_Addition_Multiple(int first, int second, int expectedresult)
        {
            var calculated = calc.Addition(first, second);
            Assert.AreEqual(expectedresult, calculated);
        }

        [Ignore("Ignore test")]
        public void Test_To_Ignore()
        {
        }

    }
}
In the above code, in Setup I will create an instance of Calculator class. And in the Teardown, I will dispose the object.
Test Ordering
The last feature I want to share is the ordering of test cases. If there is a need to test methods in order, this is a very powerful feature.
using NUnit.Framework;
using System;

namespace Nunit.Demo.Test
{
    [TestFixture]
    public class CalculatorTest
    {
        Calculator calc;
        [SetUp]
        public void Setup()
        {
            calc = new Calculator();
        }

        [TearDown]
        public void Teardown()
        {
            calc.Dispose();
        }

        [Test, Order(2)]
        public void Test_Addition_With_Valid_Intigers()
        {
            var result = calc.Addition(3, 5);
            Assert.AreEqual(8, result);
        }

        [Test, Order(1)]
        public void Test_Substraction_Argument_Exception() {
            Assert.Catch<SystemException>(() => calc.Subtraction(4, 5));
            Assert.Throws<ArgumentException>(() => calc.Subtraction(4, 5));
        }

        [TestCase(1,2,3), Order(3)]
        [TestCase(2, 3, 5)]
        [TestCase(3, 4, 7)]
        public void Test_Addition_Multiple(int first, int second, int expectedresult)
        {
            var calculated = calc.Addition(first, second);
            Assert.AreEqual(expectedresult, calculated);
        }

        [Ignore("Ignore test")]
        public void Test_To_Ignore()
        {
        }

    }
}
The tests will be executed in the order defined. I have demonstrated this in the YouTube video: https://youtu.be/JyfRNBlXPZA
Conclusion
In conclusion, NUnit is very powerful and easy to use a testing framework. You can visit documentation in the NUnit website http://nunit.org/
Source code: https://github.com/choudhurynirjhar/nunit-demo